Non-Delivery Report (NDR)
To configure the NDR, go to Microsoft’s redesigned Purview Admin Center to access Data Life Cycle Management undeliverable reports.
Note: If you are prompted to set up Microsoft Purview, click Get Started, and then once the page loads, click Exchange (legacy)
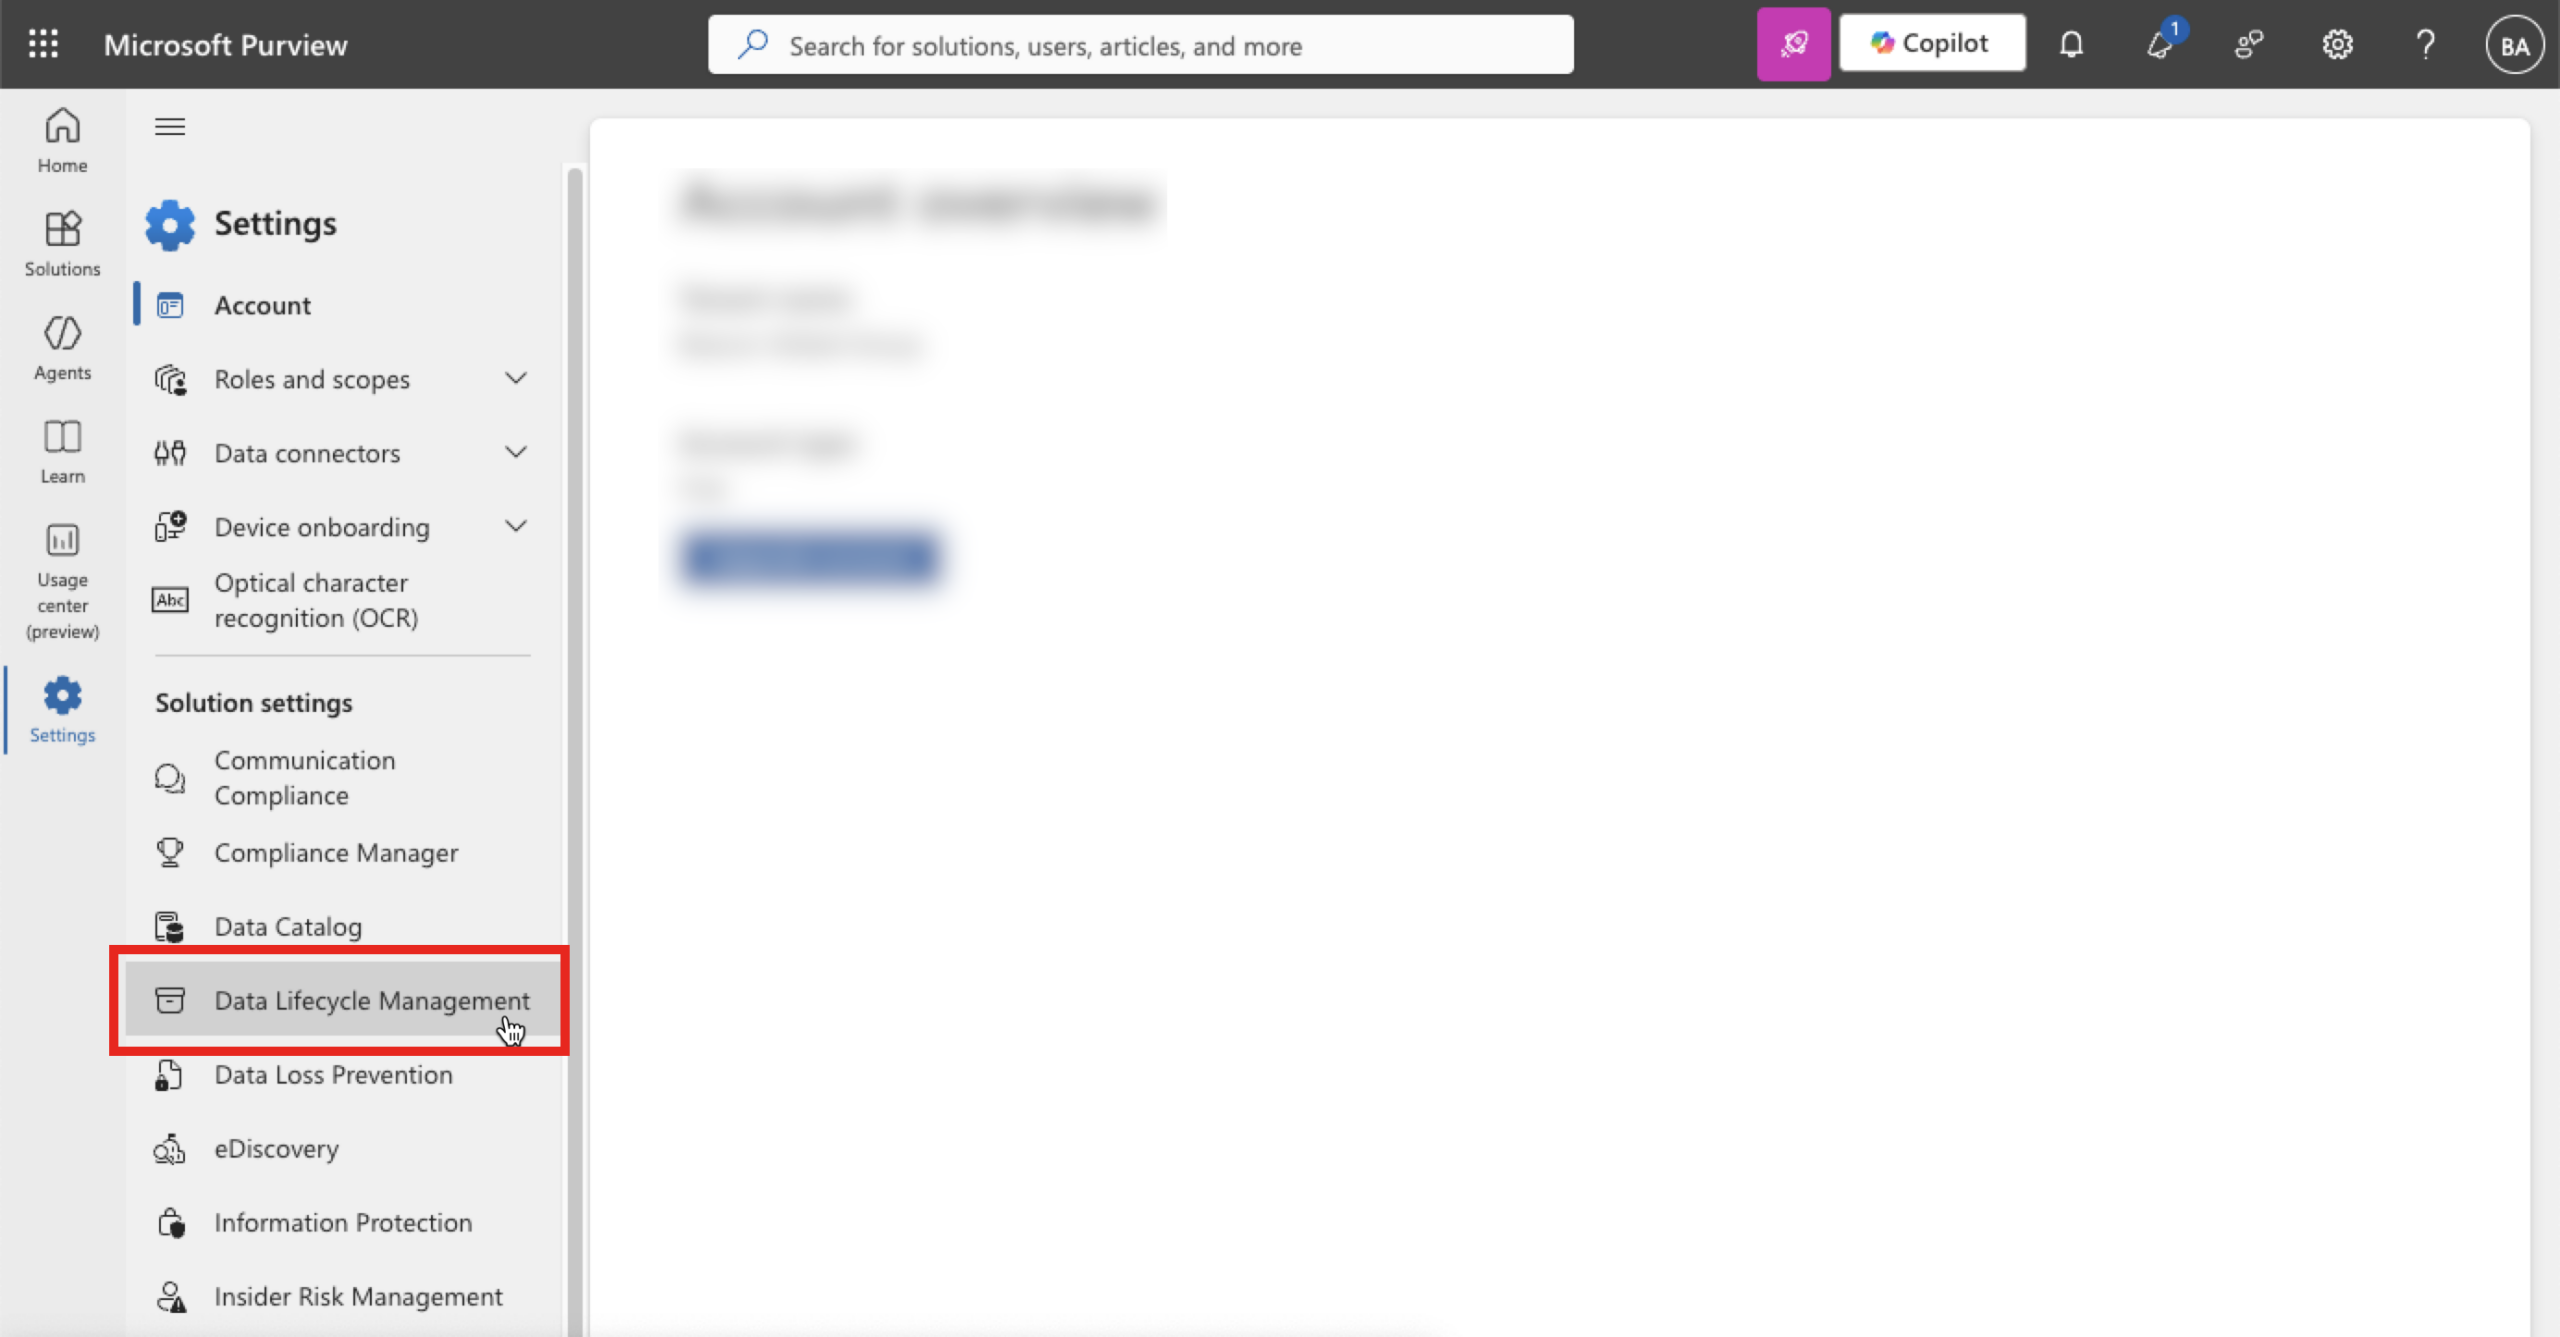
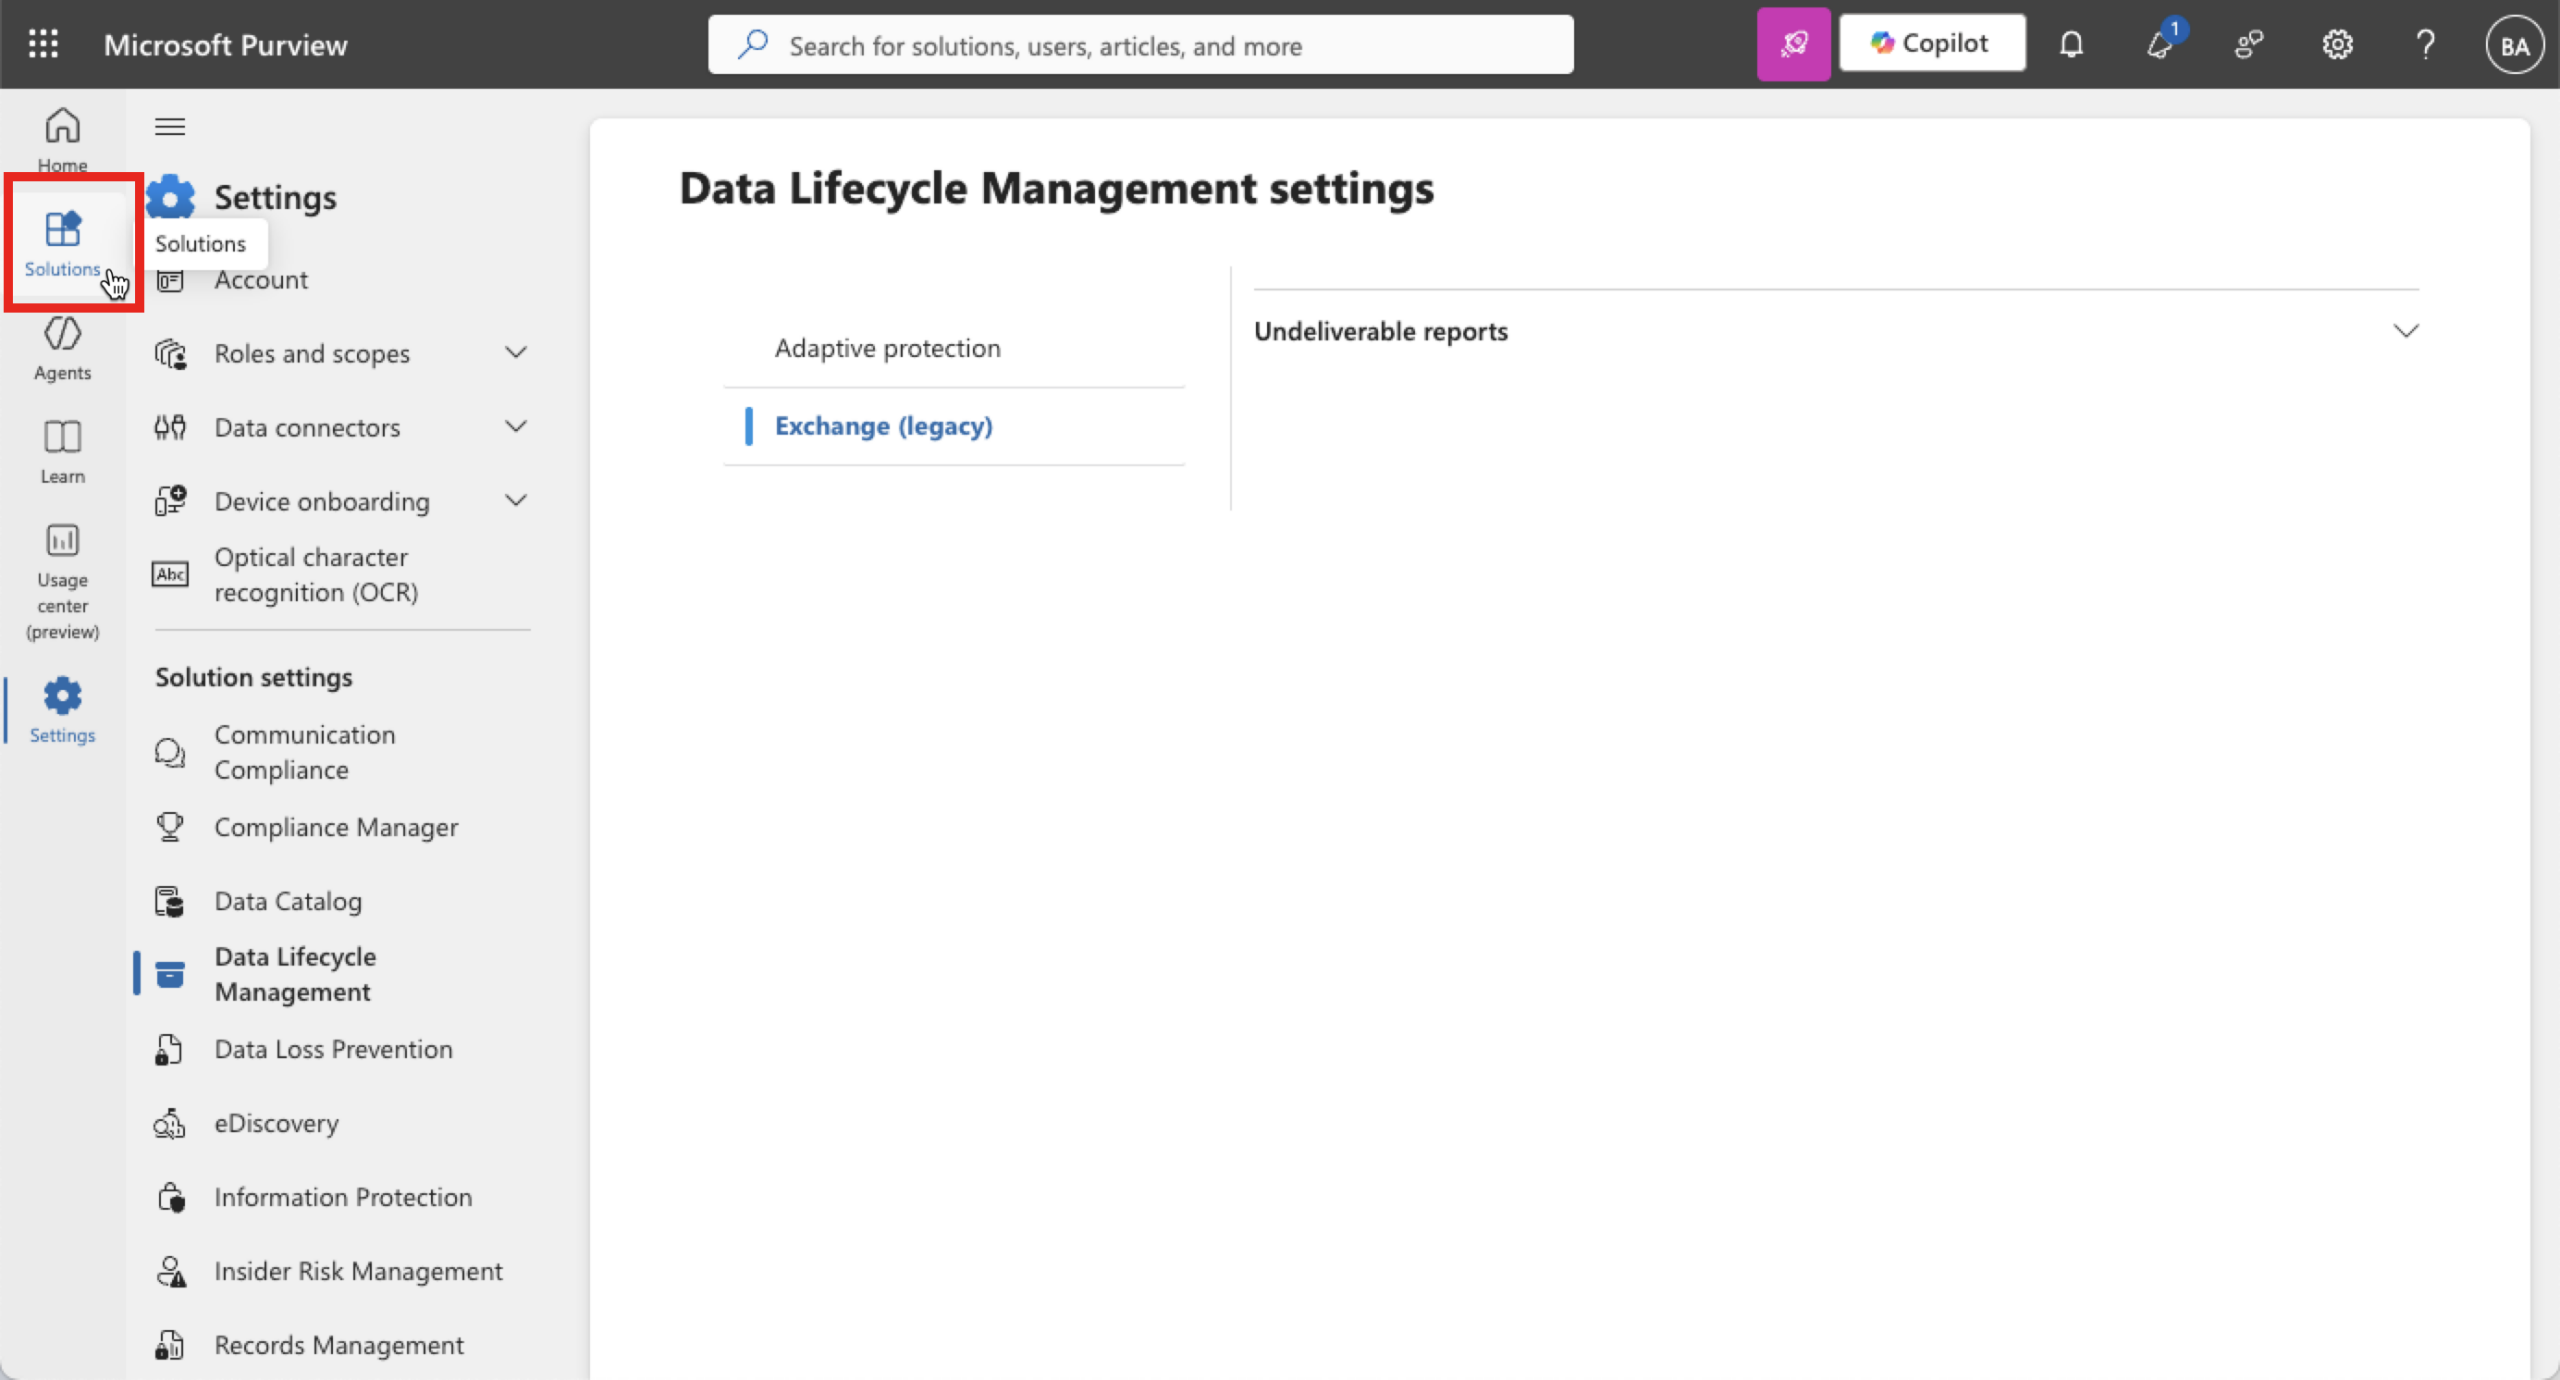
Go to Purview Admin Center – https://purview.microsoft.com/ and select Settings on the left
Click Data Lifecycle Management under Solution settings
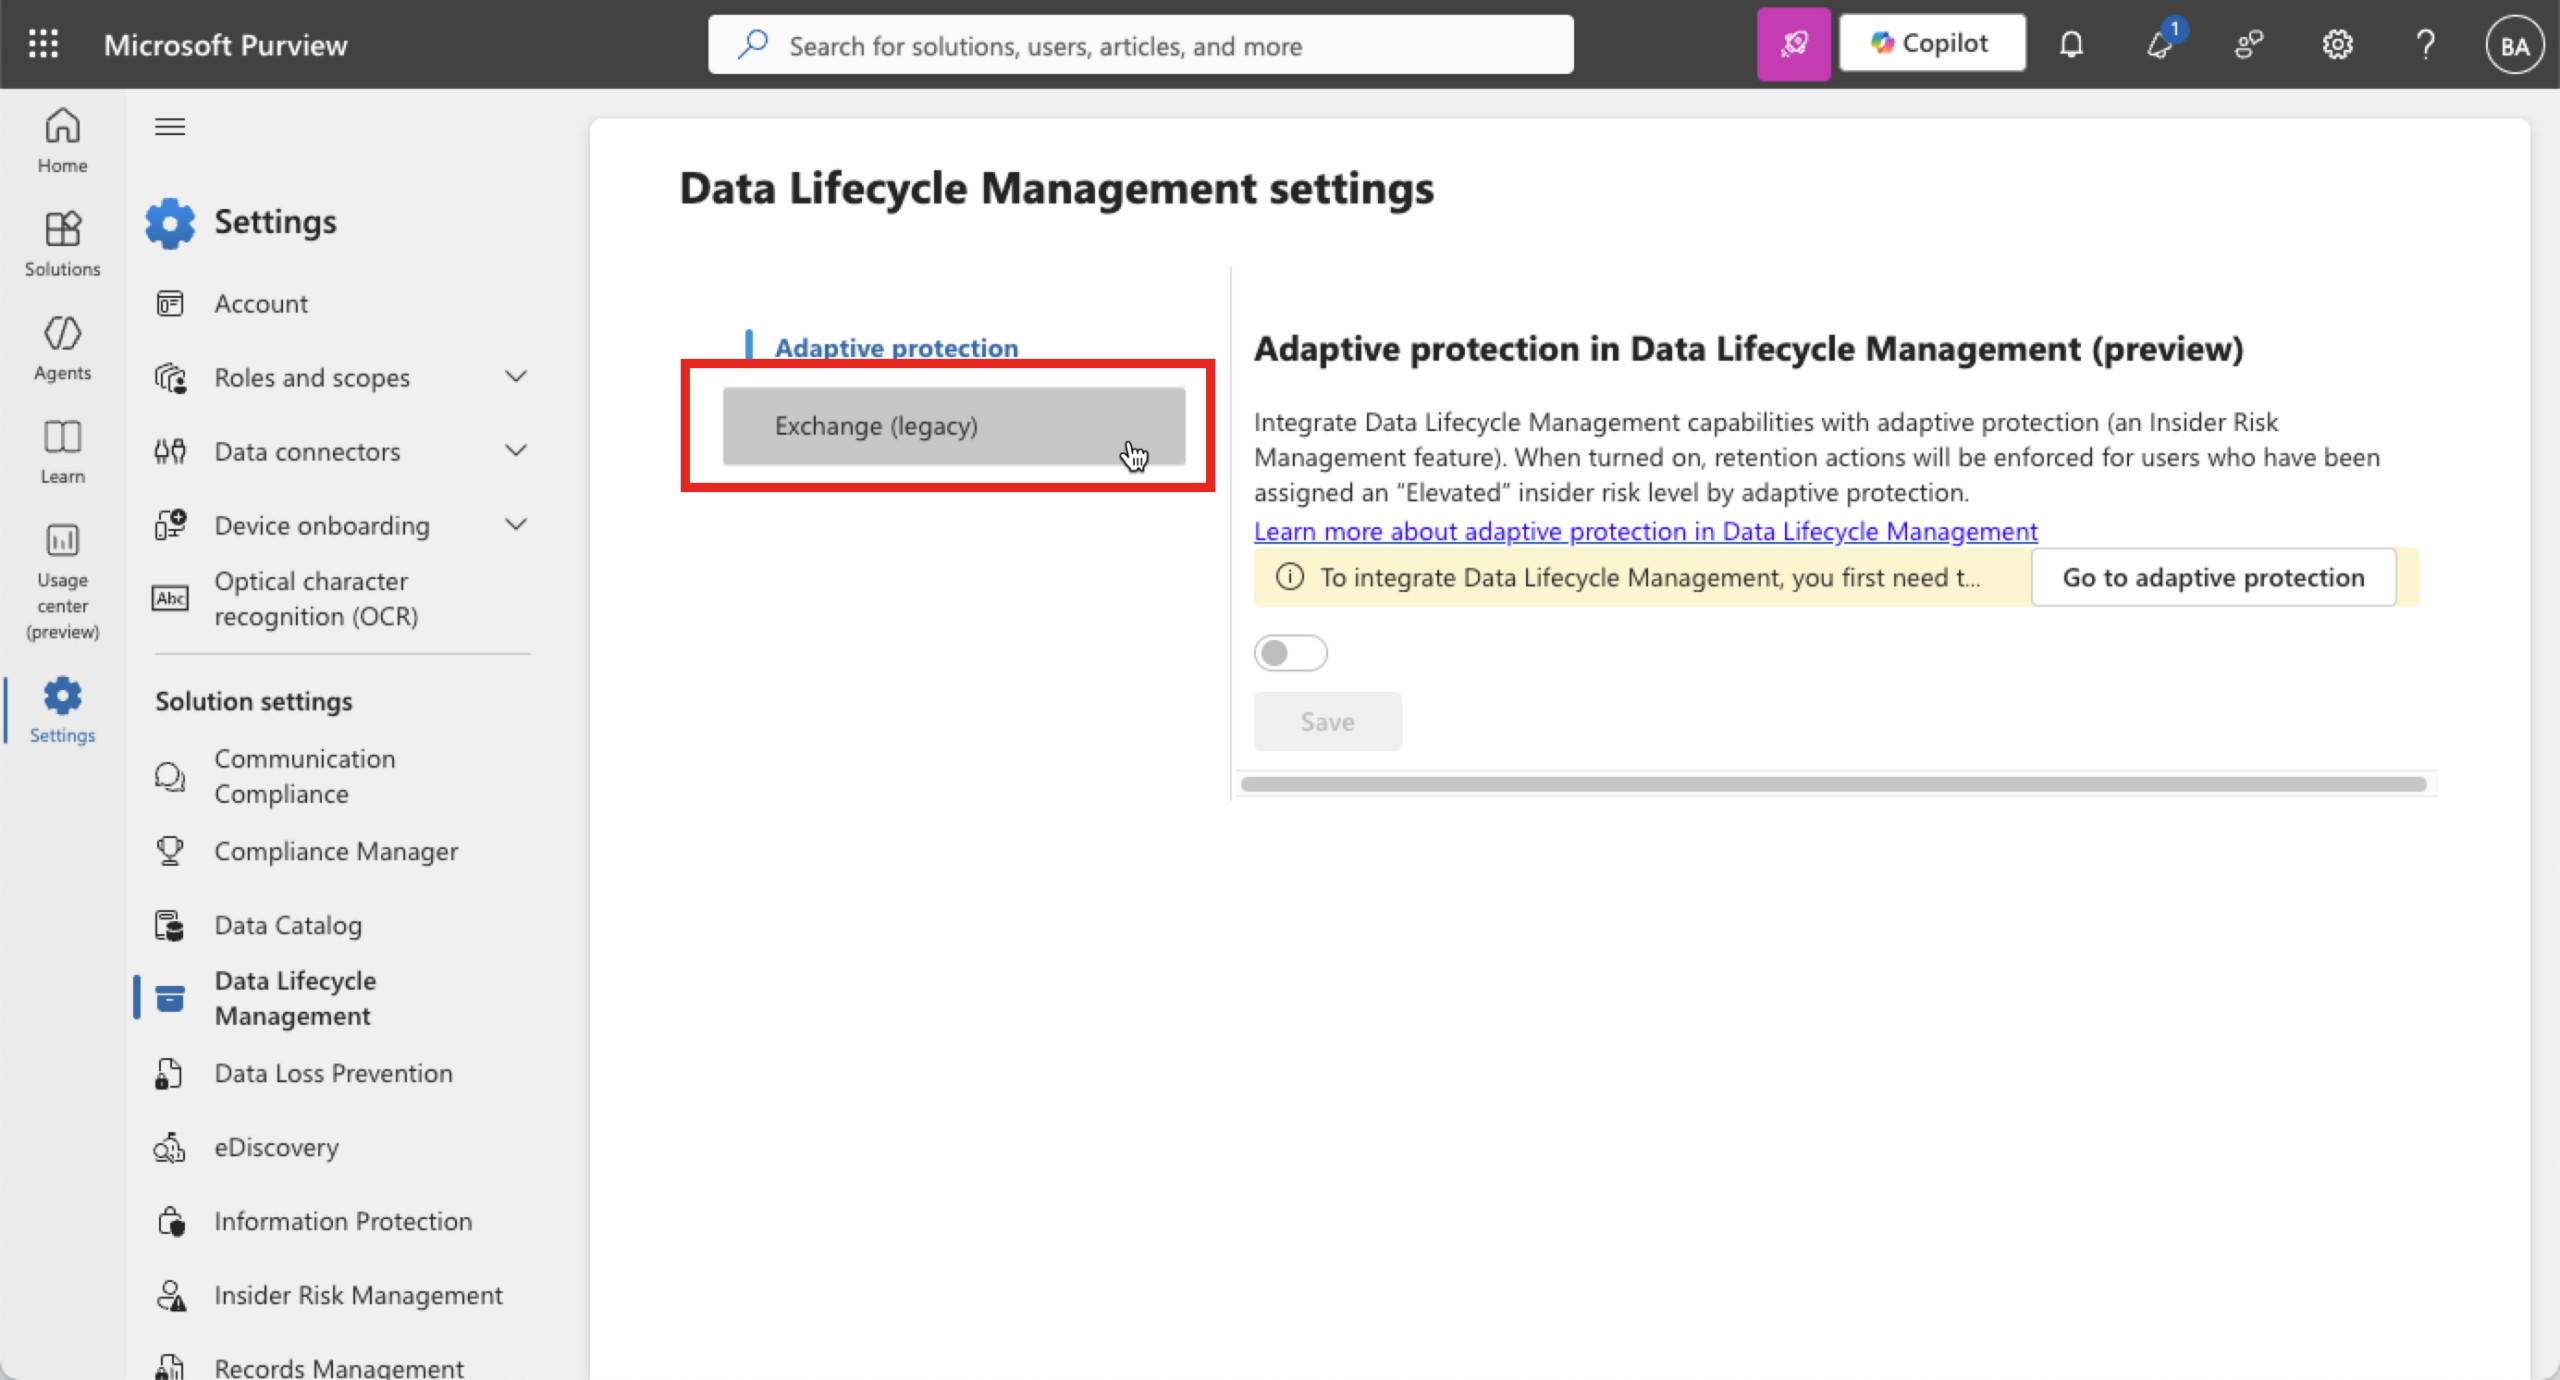
Click Exchange (legacy)
In the Undeliverable Reports section, enter an email address to receive the NDR reports and click Save.
Note: *This email MUST be EXTERNAL and unaffiliated with Microsoft. We suggest creating a free Gmail account with domainNDR@gmail.com where the domain is your domain name.

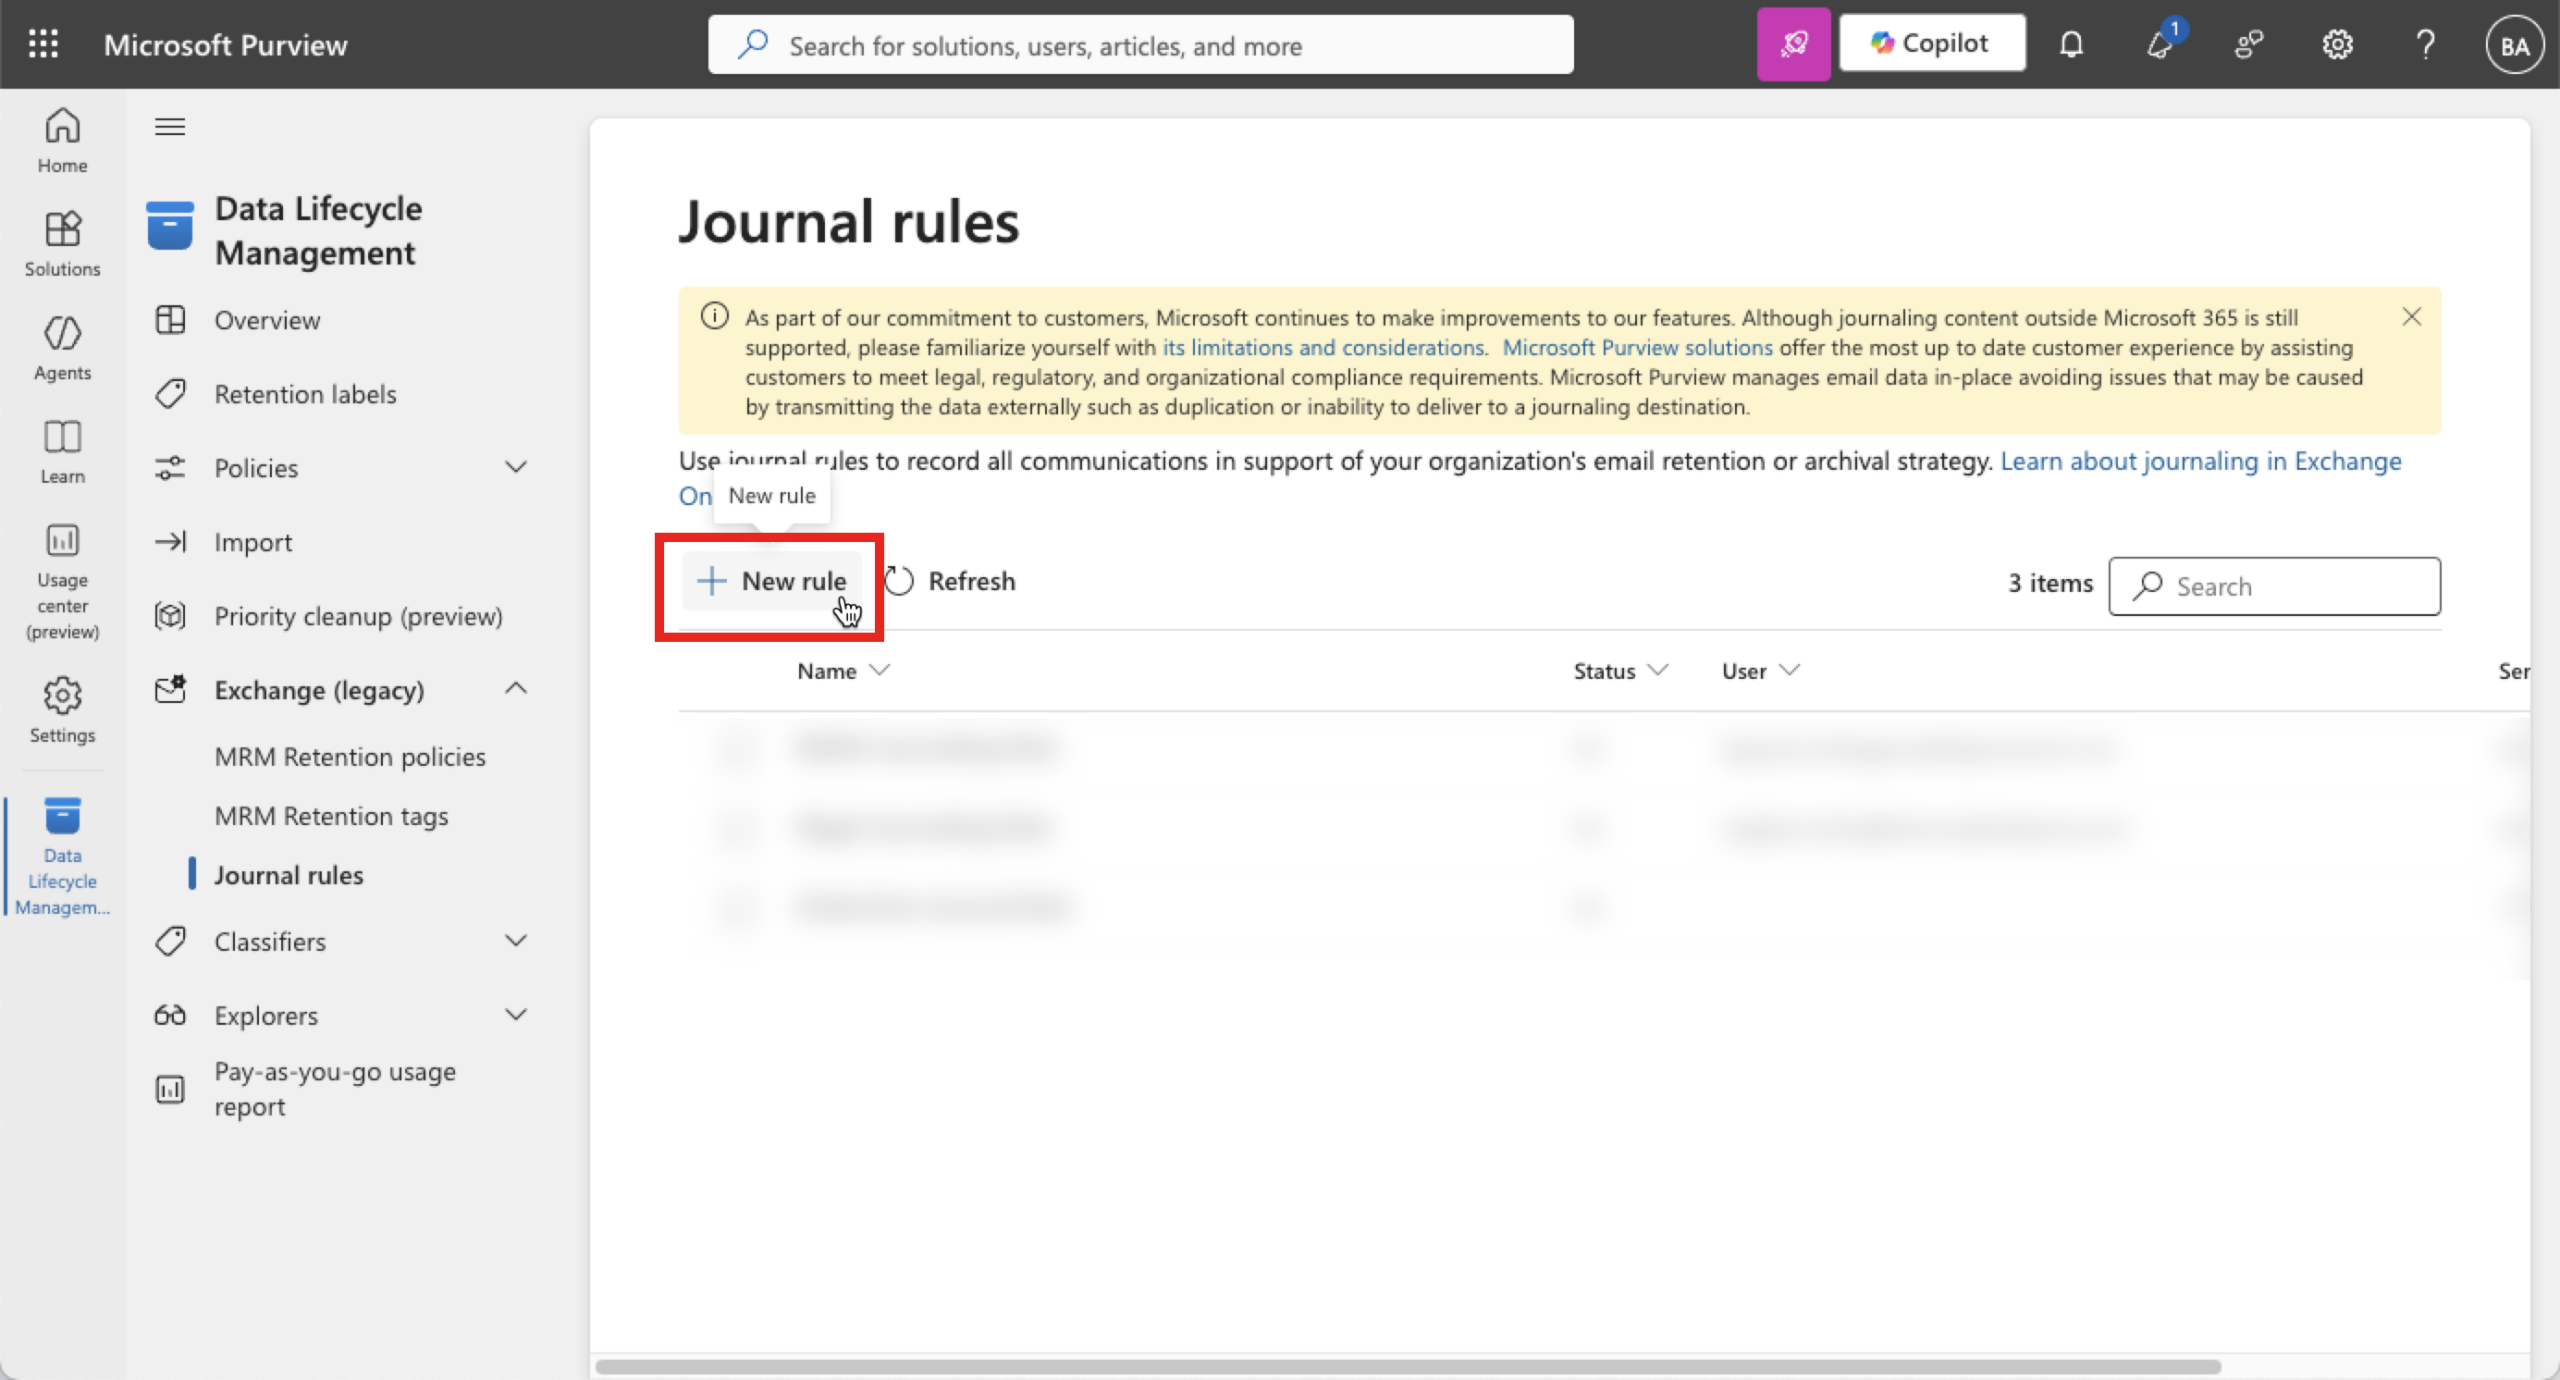
Creating Journaling Rule
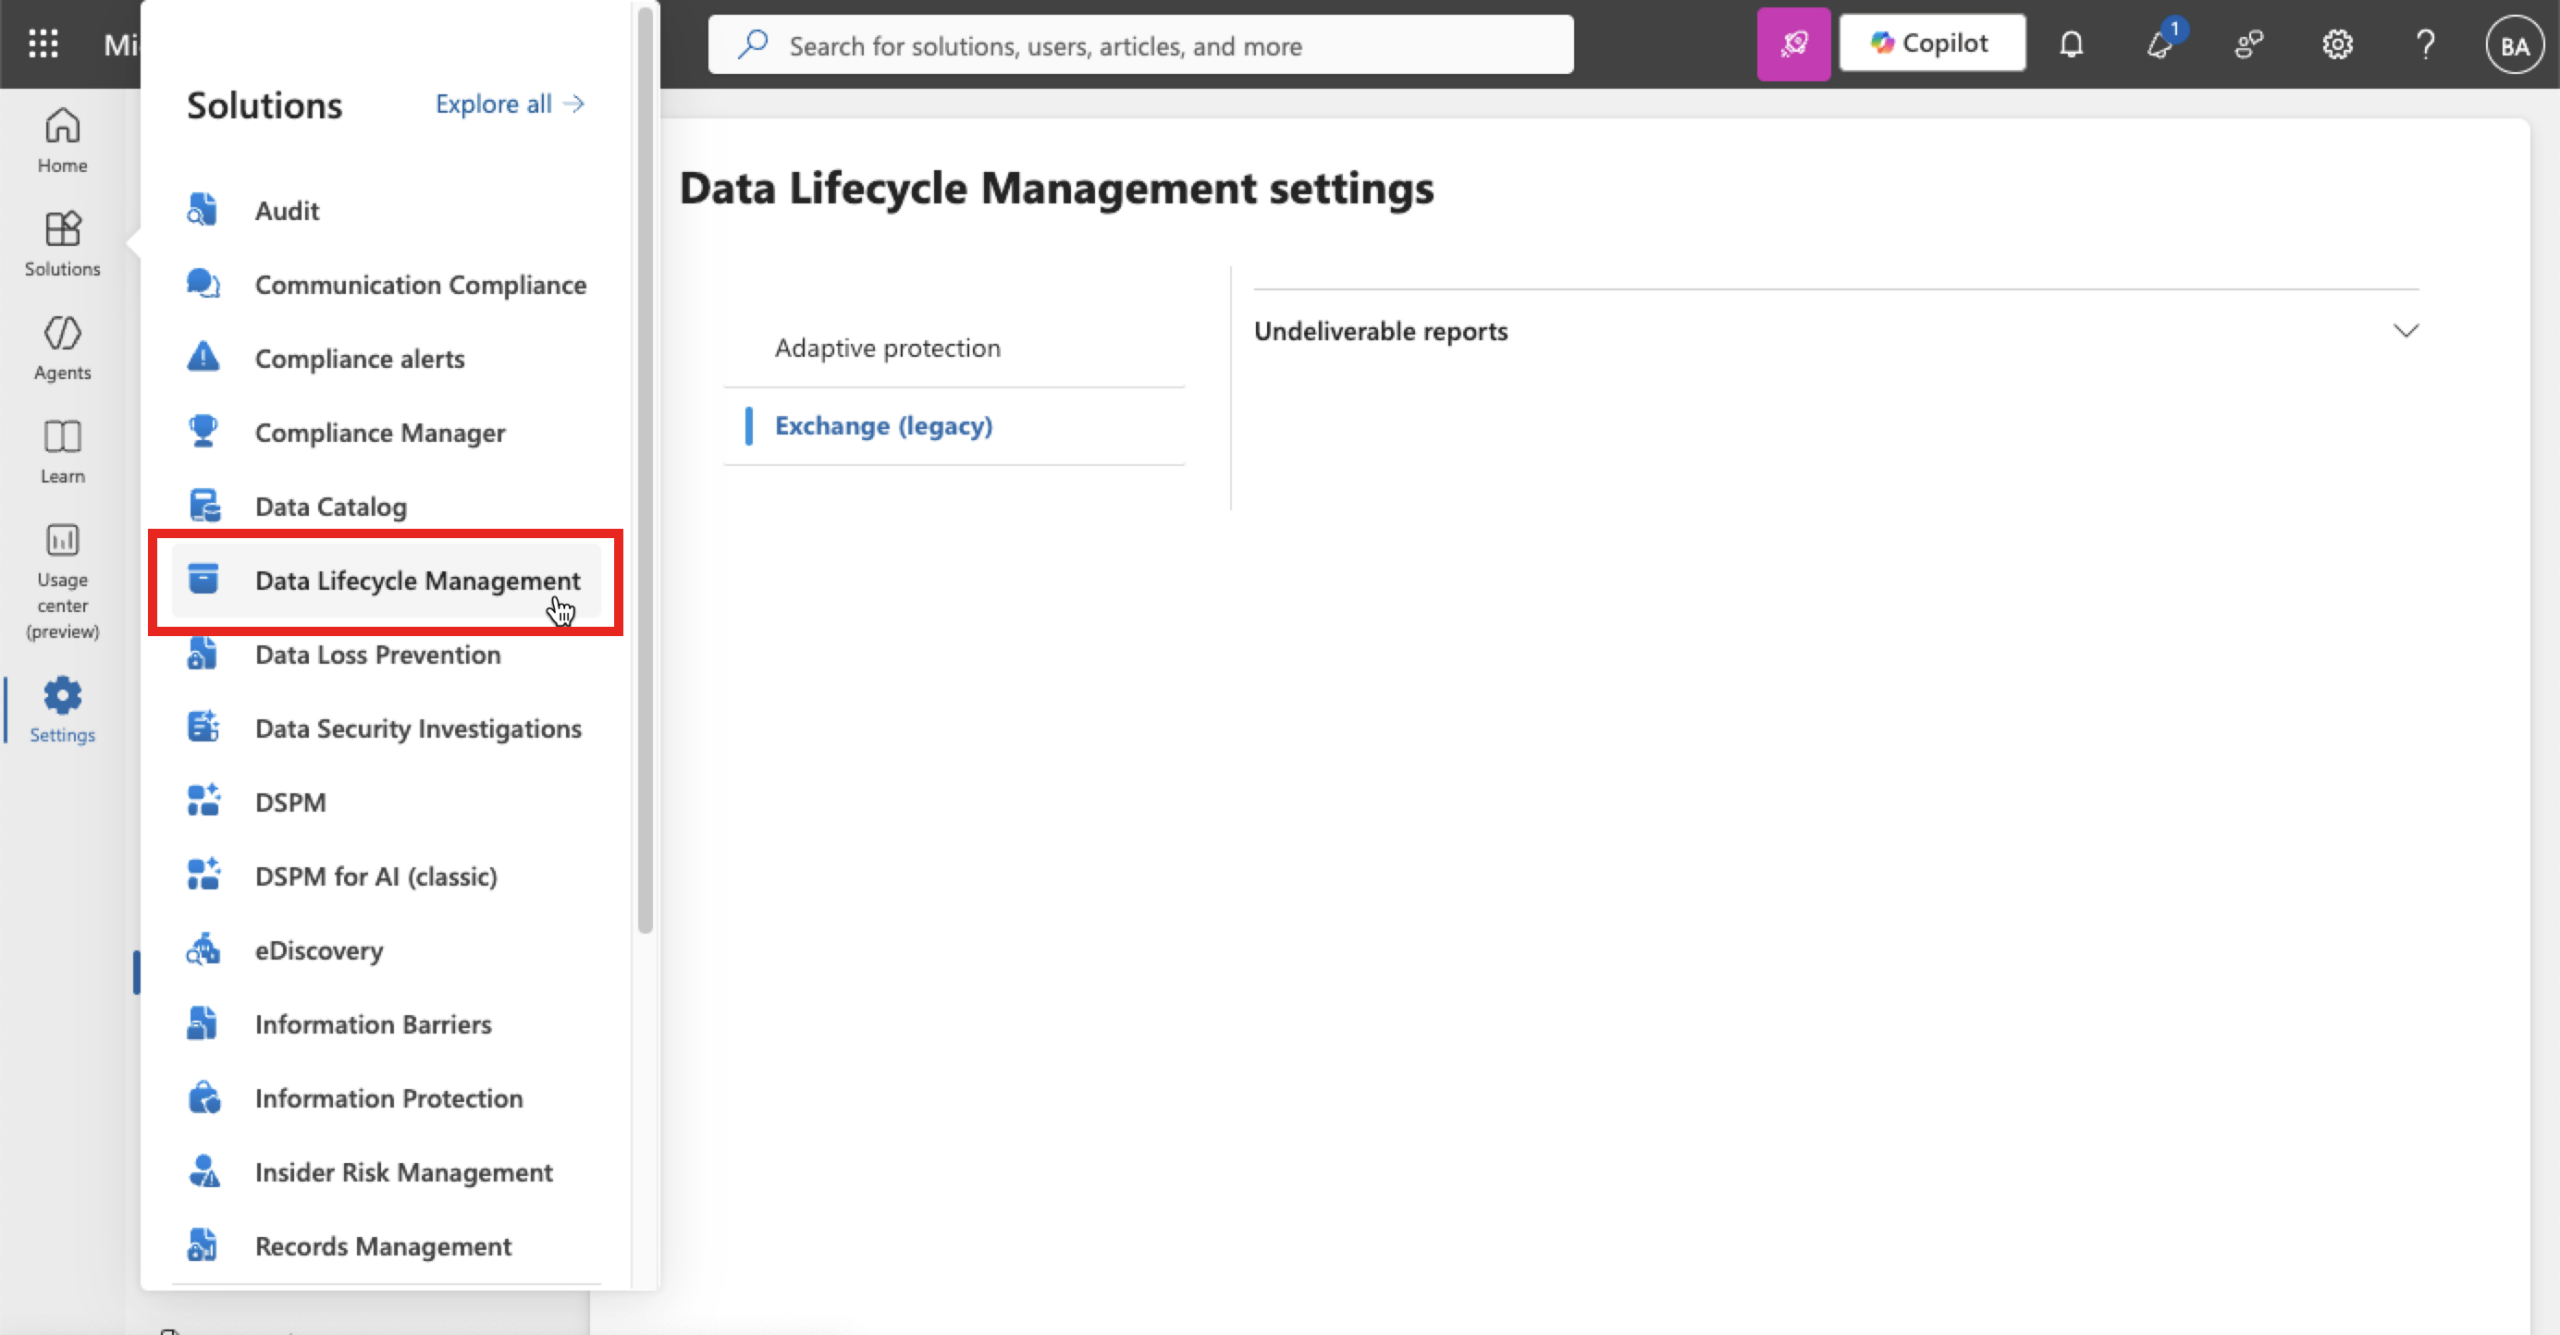
Using the menu on the left, click Solutions
Click Data Lifecycle Management
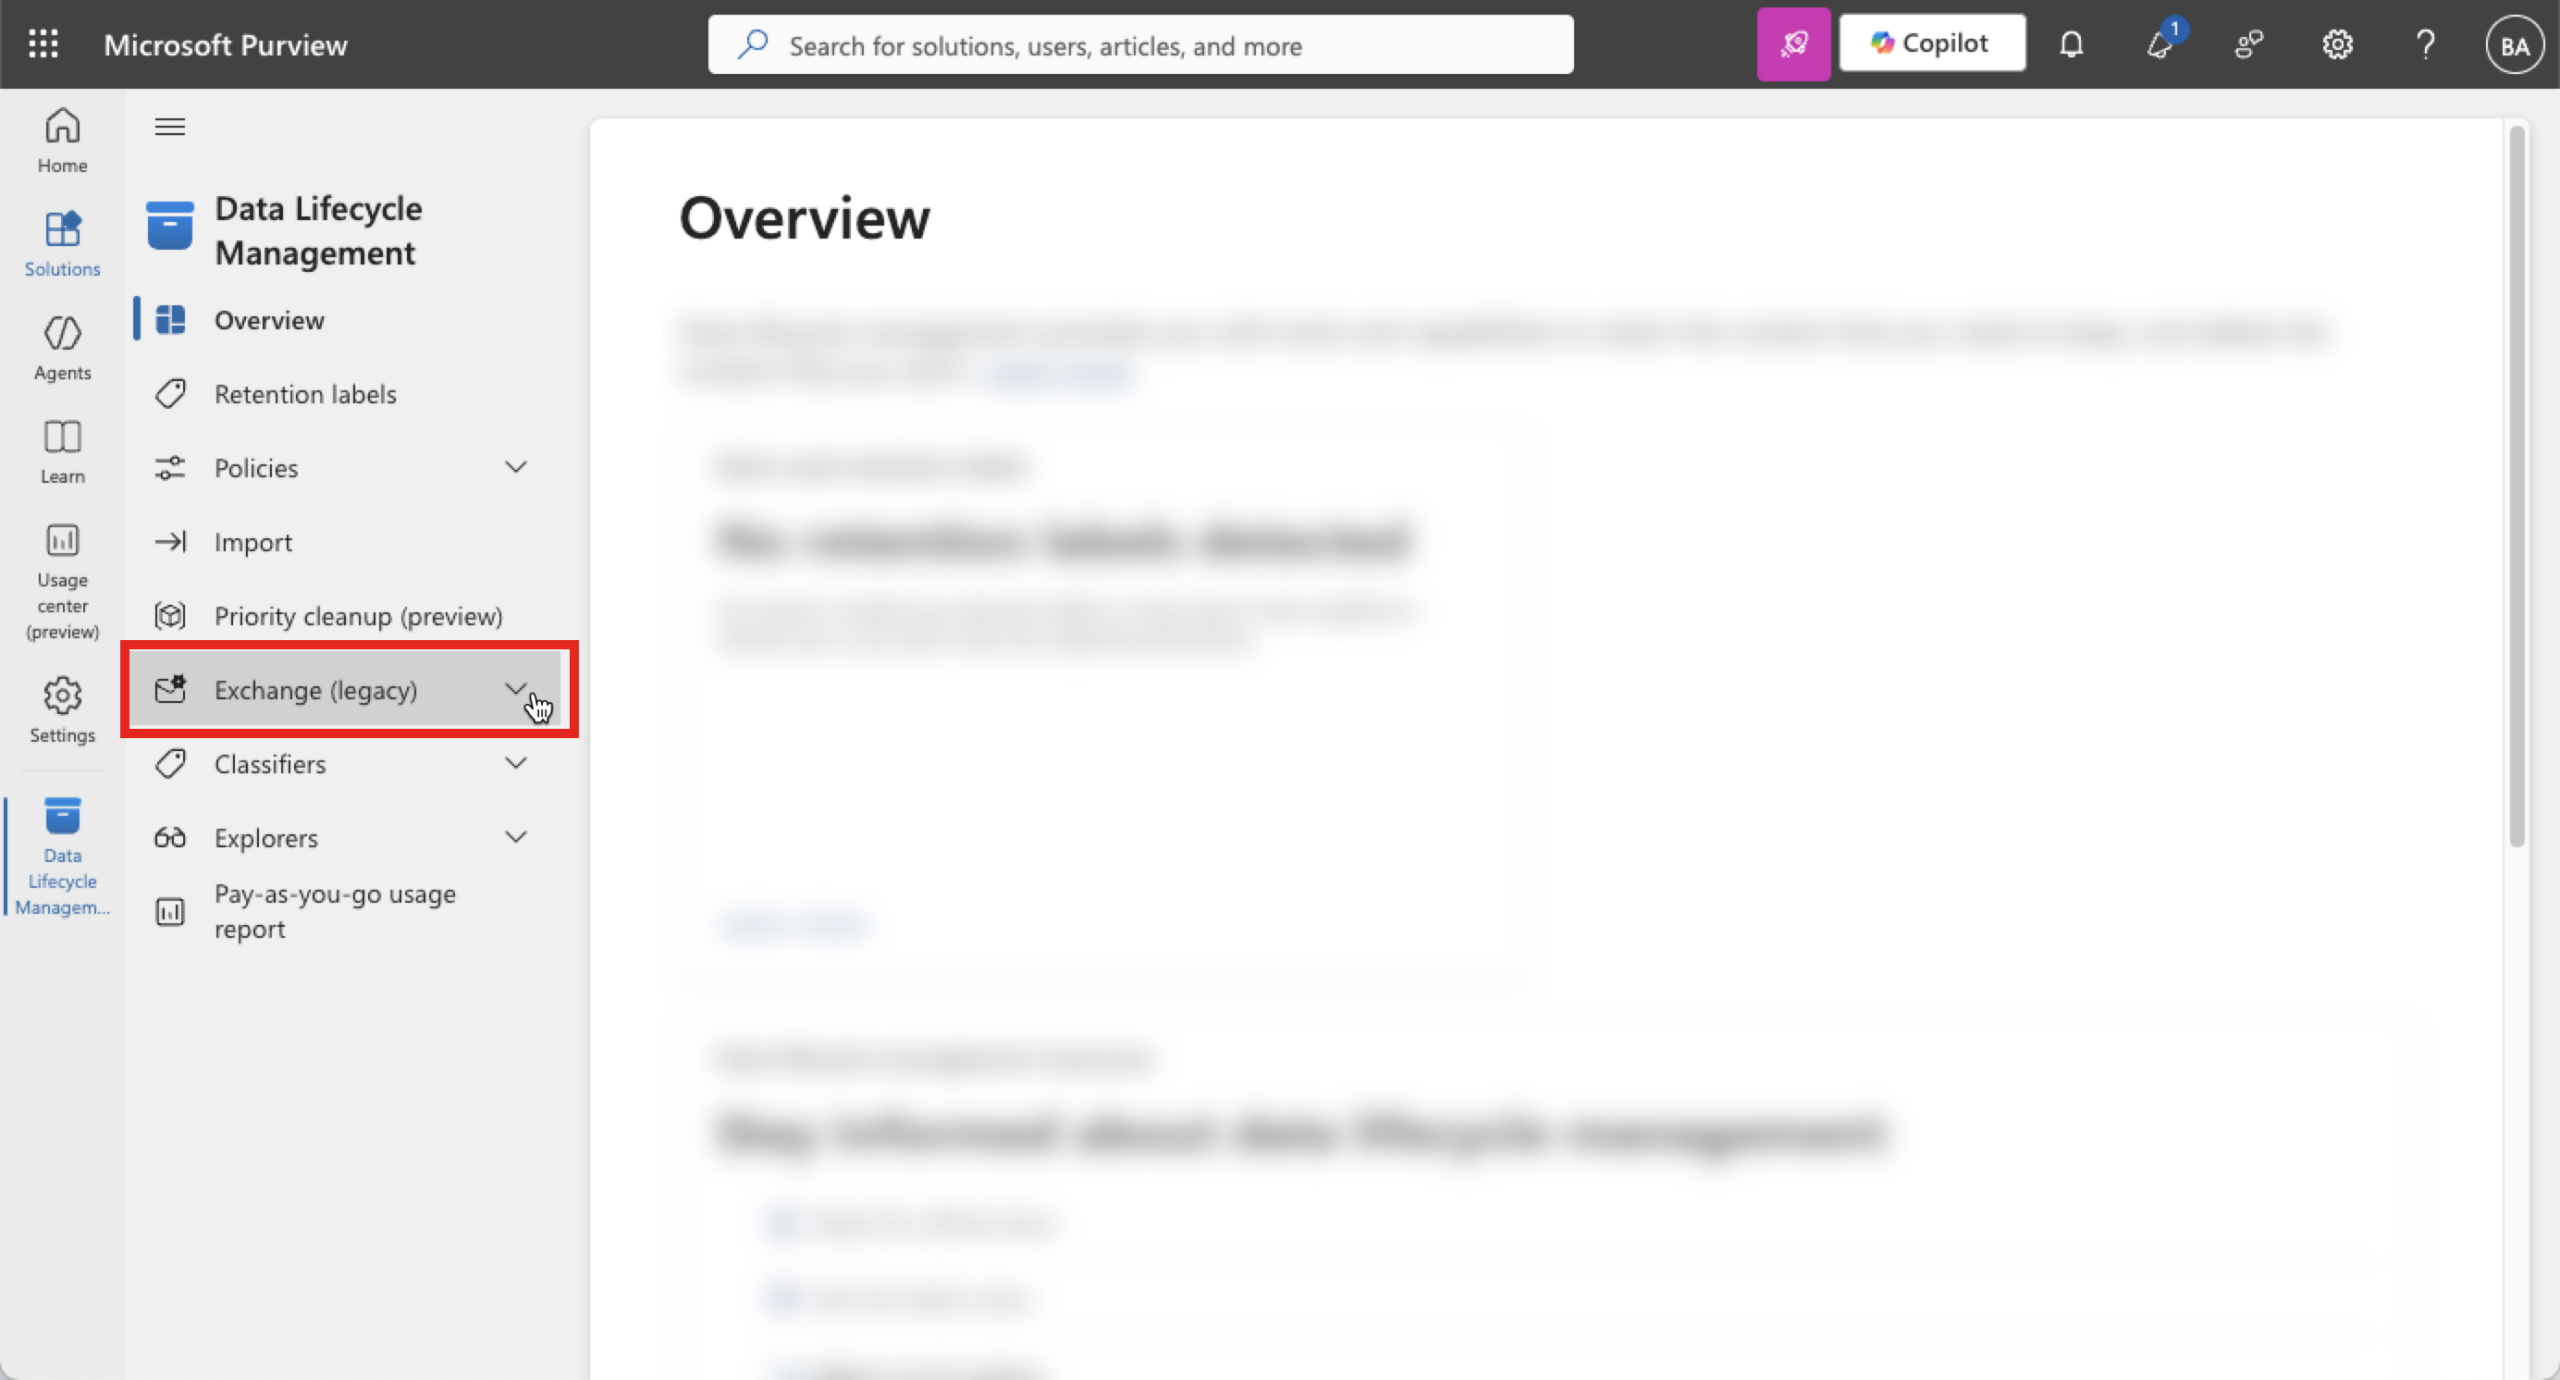
Click Exchange (legacy)
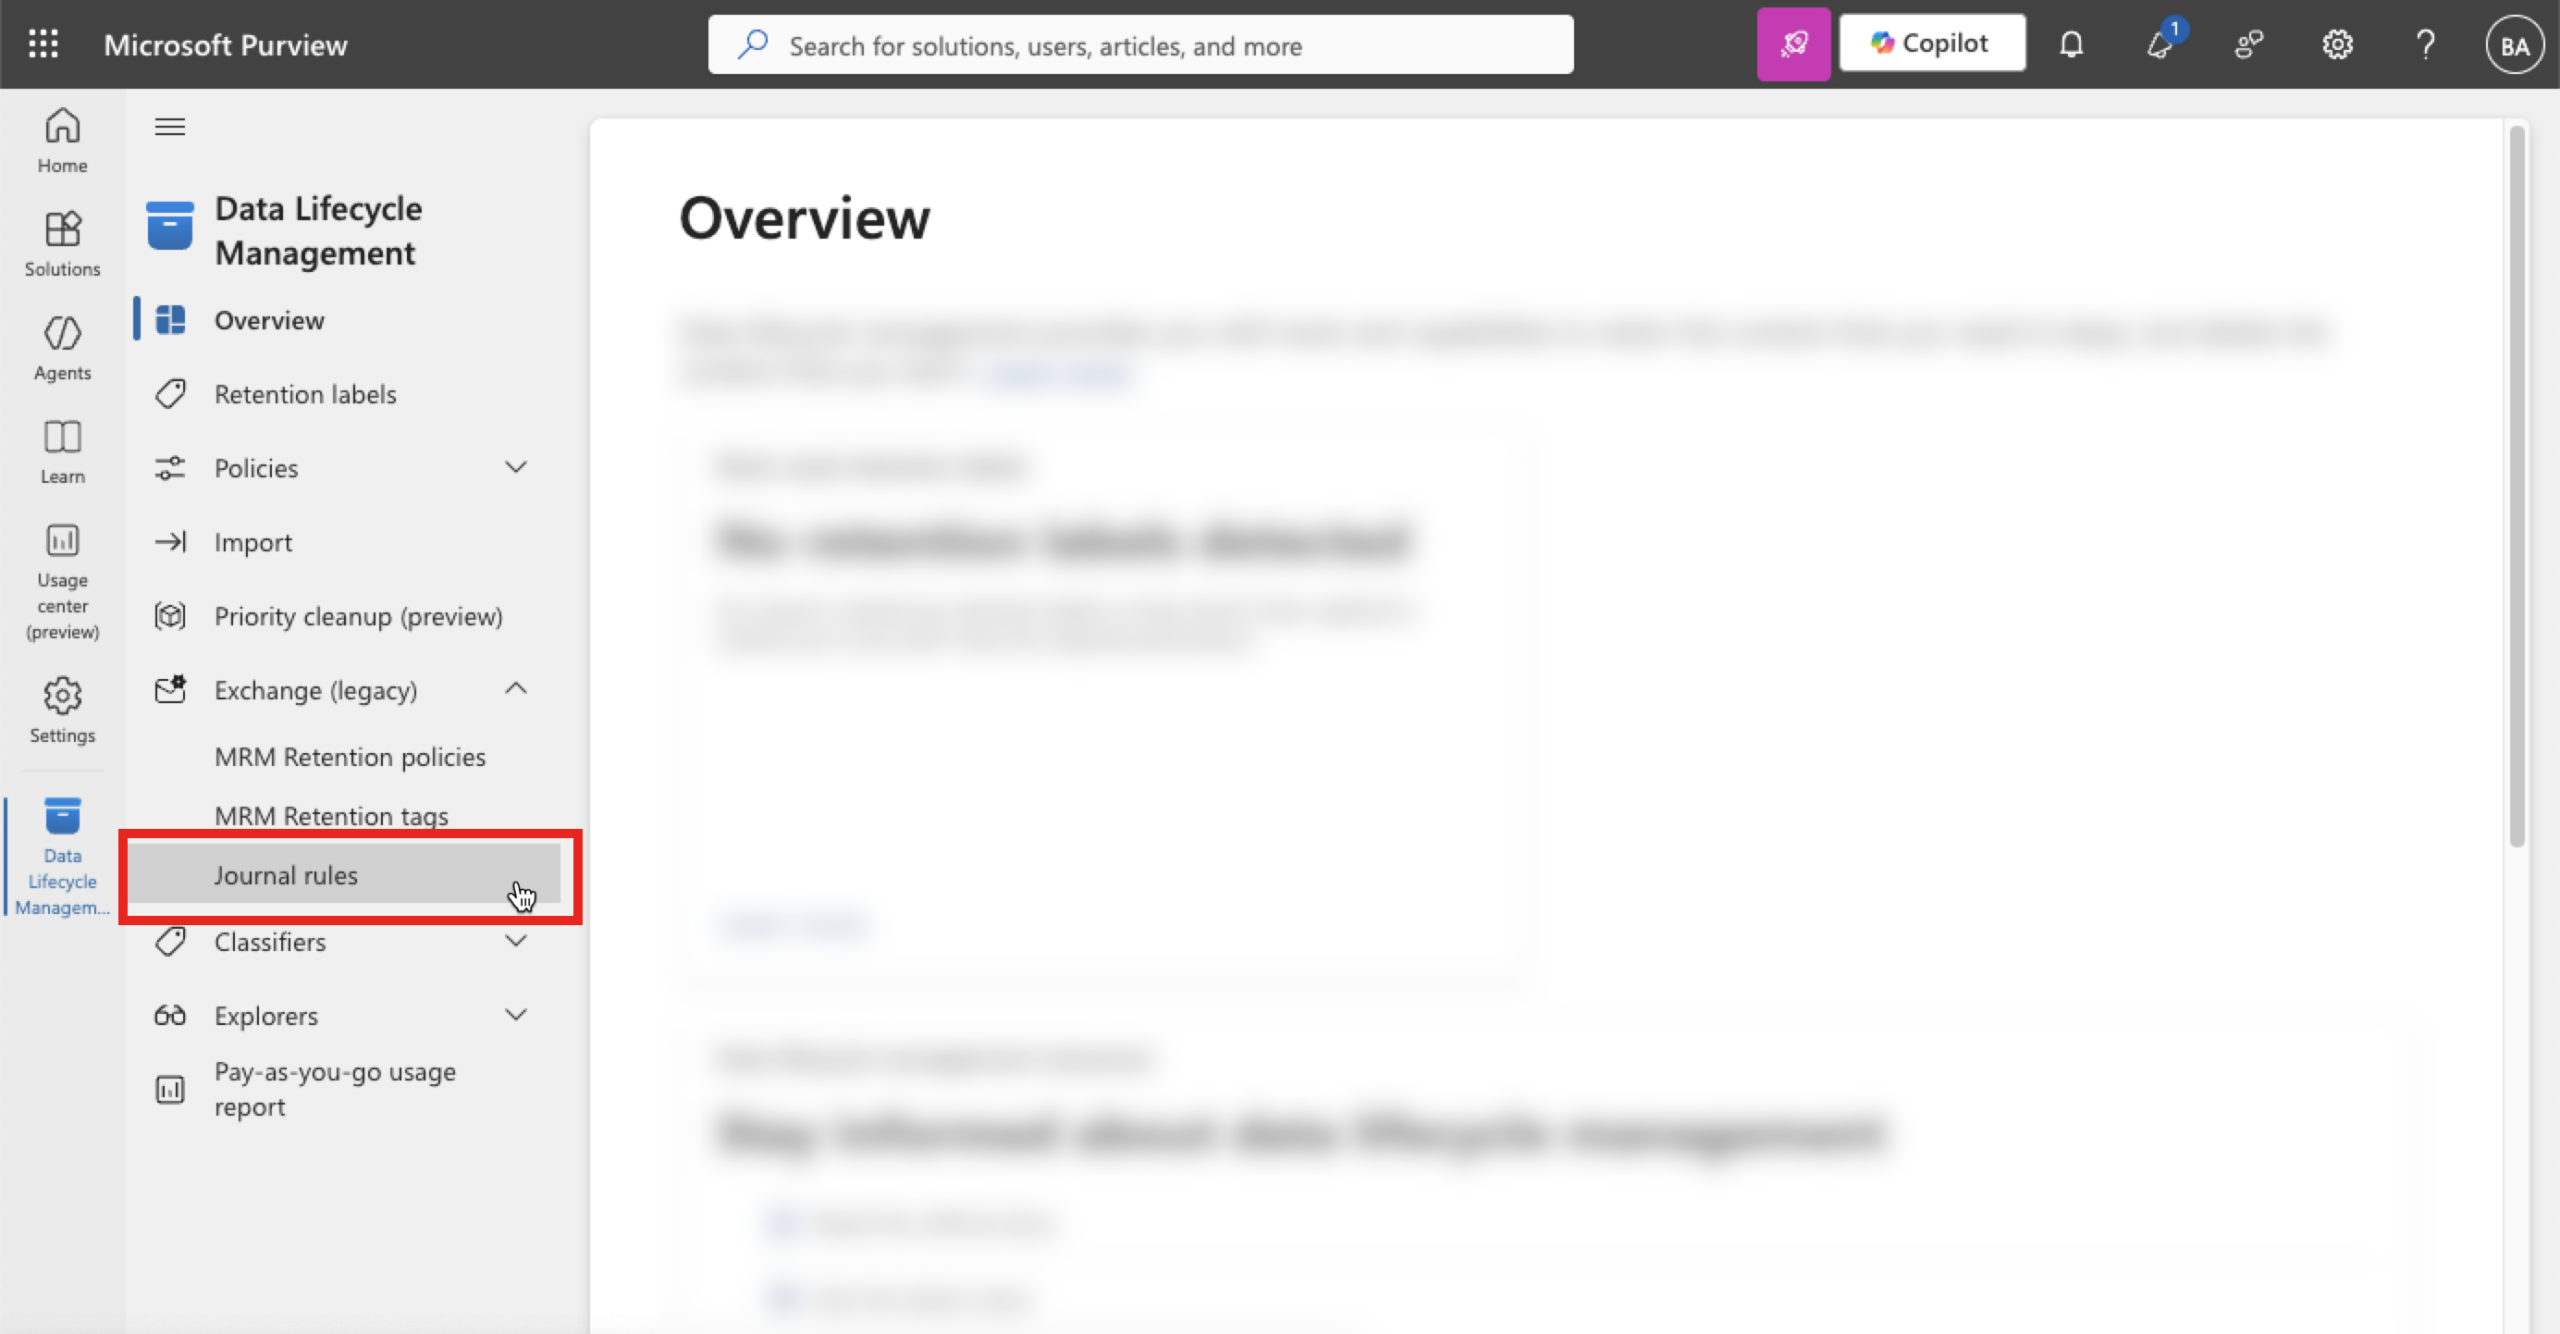
Click Journal Rules
Click + New rule
- Send journal reports to: 177faf96fc23c292dc53176b4de2c264@74300.journal.archive.zixcentral.com
- Journal rule name: BGAN ZixArchive Journal Rule
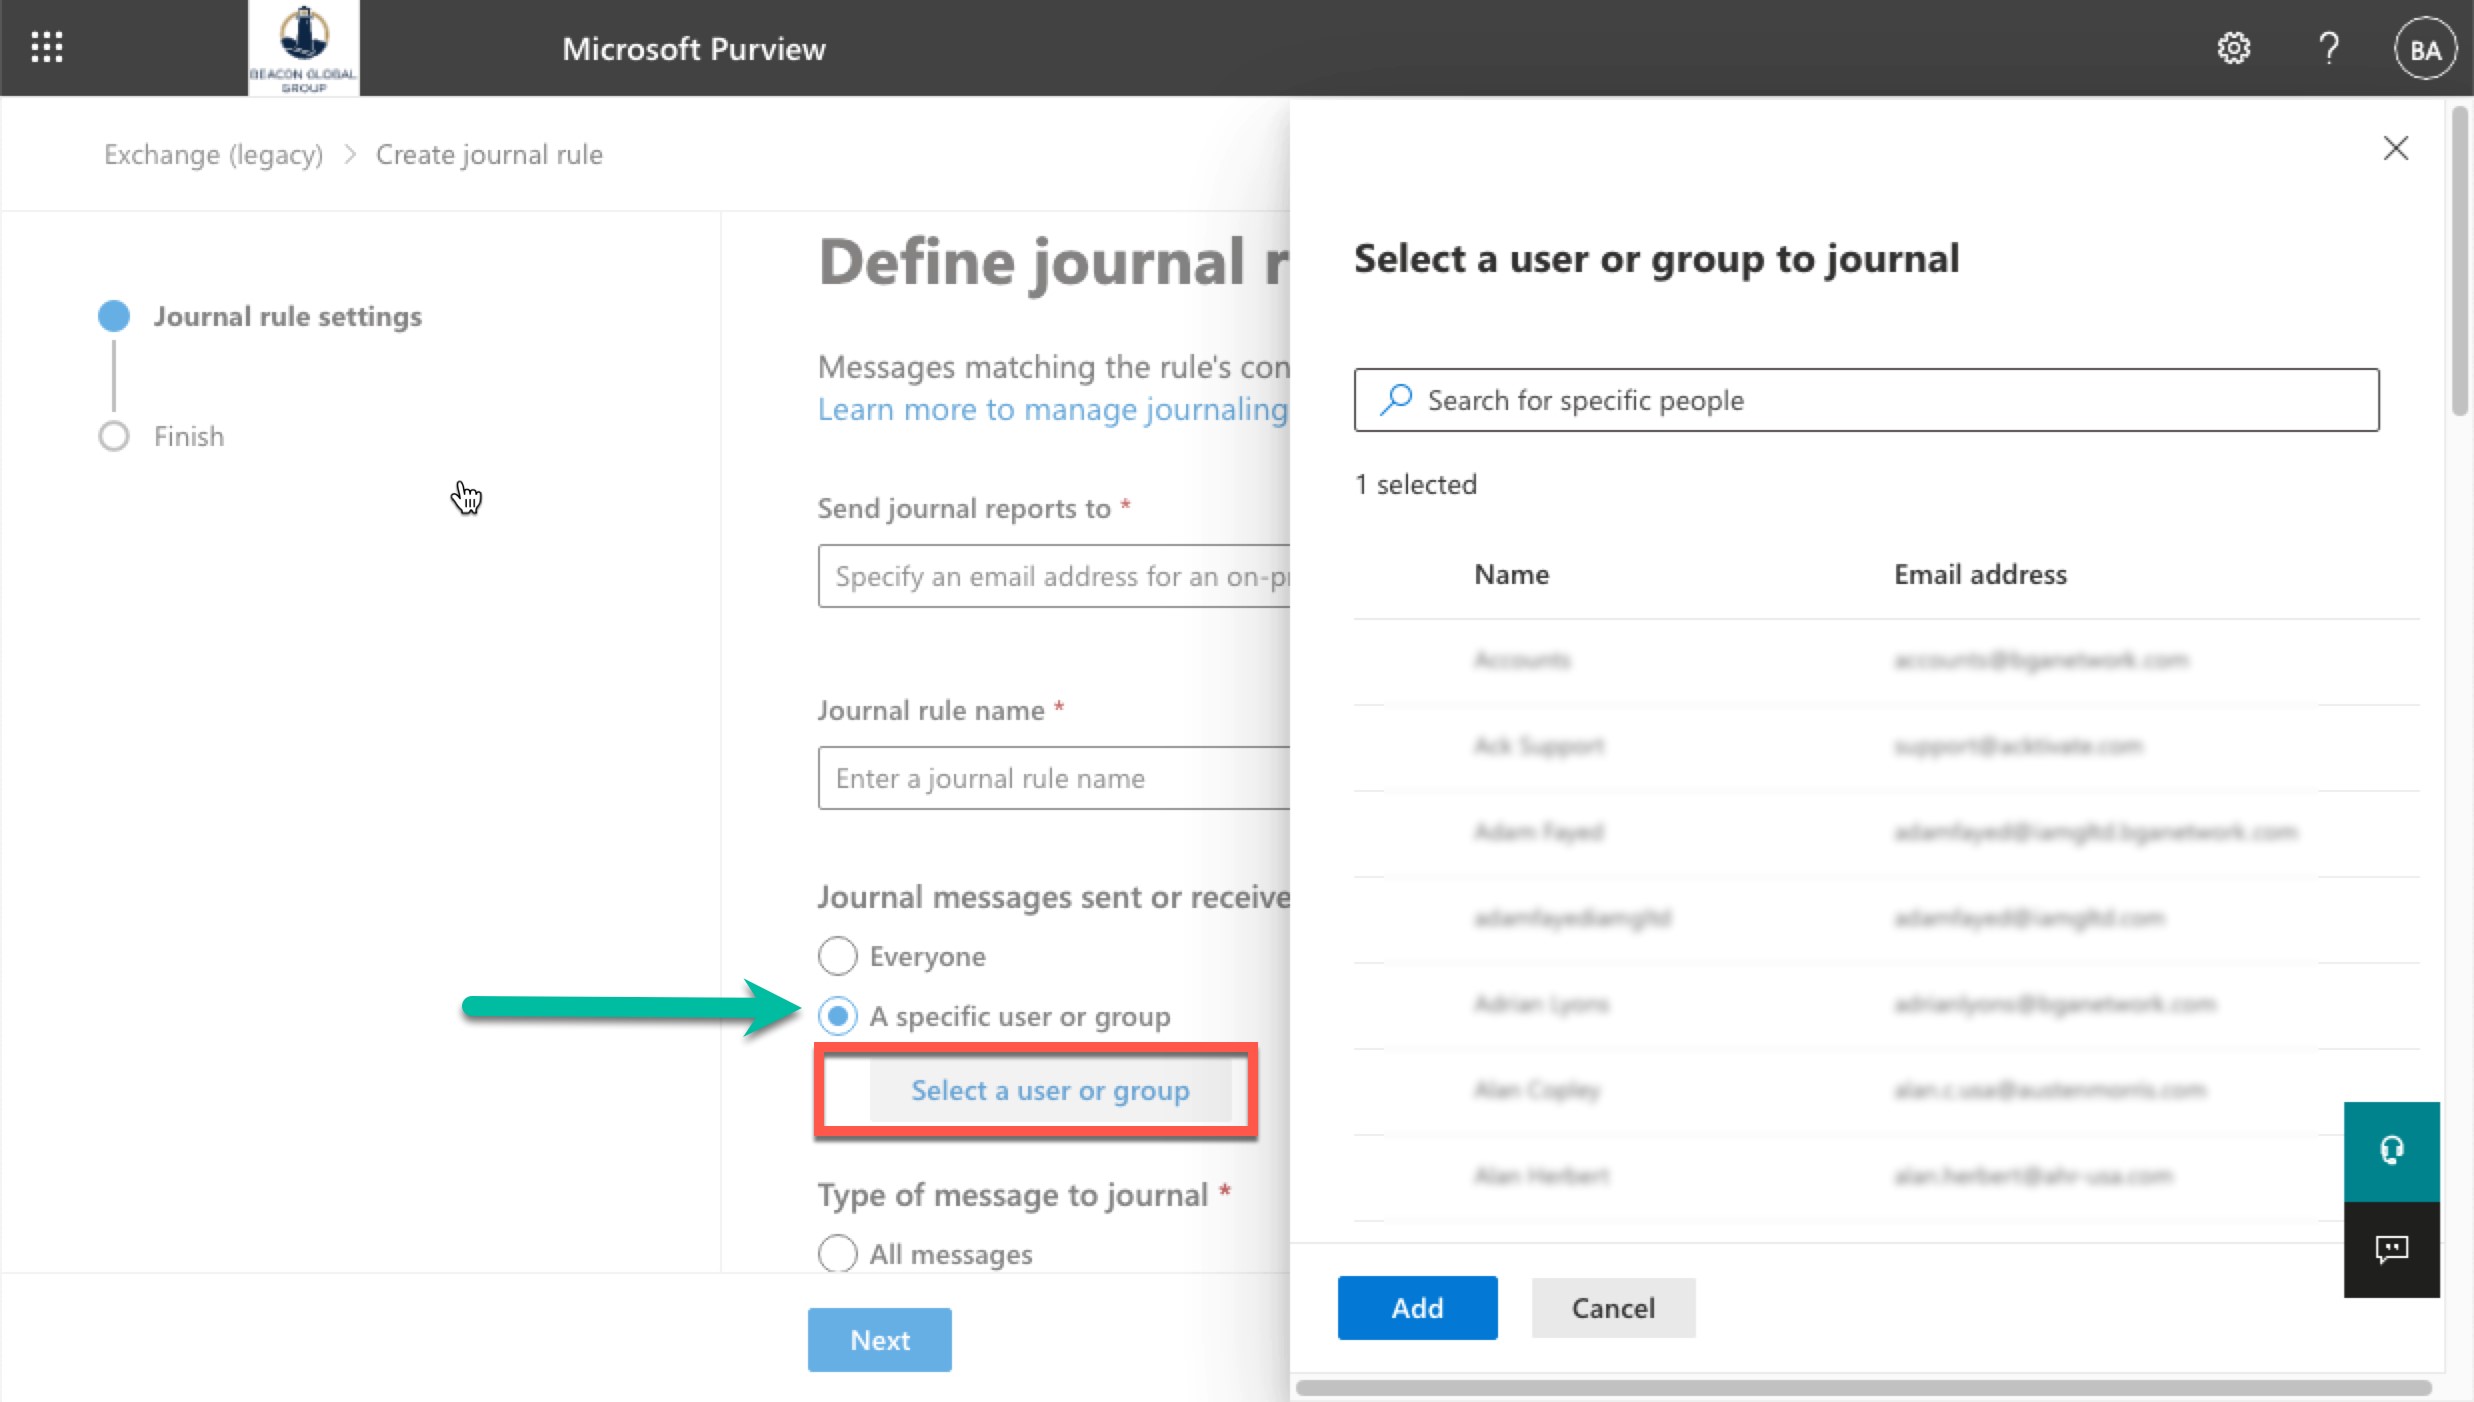
- See below if you want to select A specific user or group, otherwise select Everyone
- If a group, see the section below on Creating a Group
- Select All messages
- Click Next
- Review all the settings to finalize and save

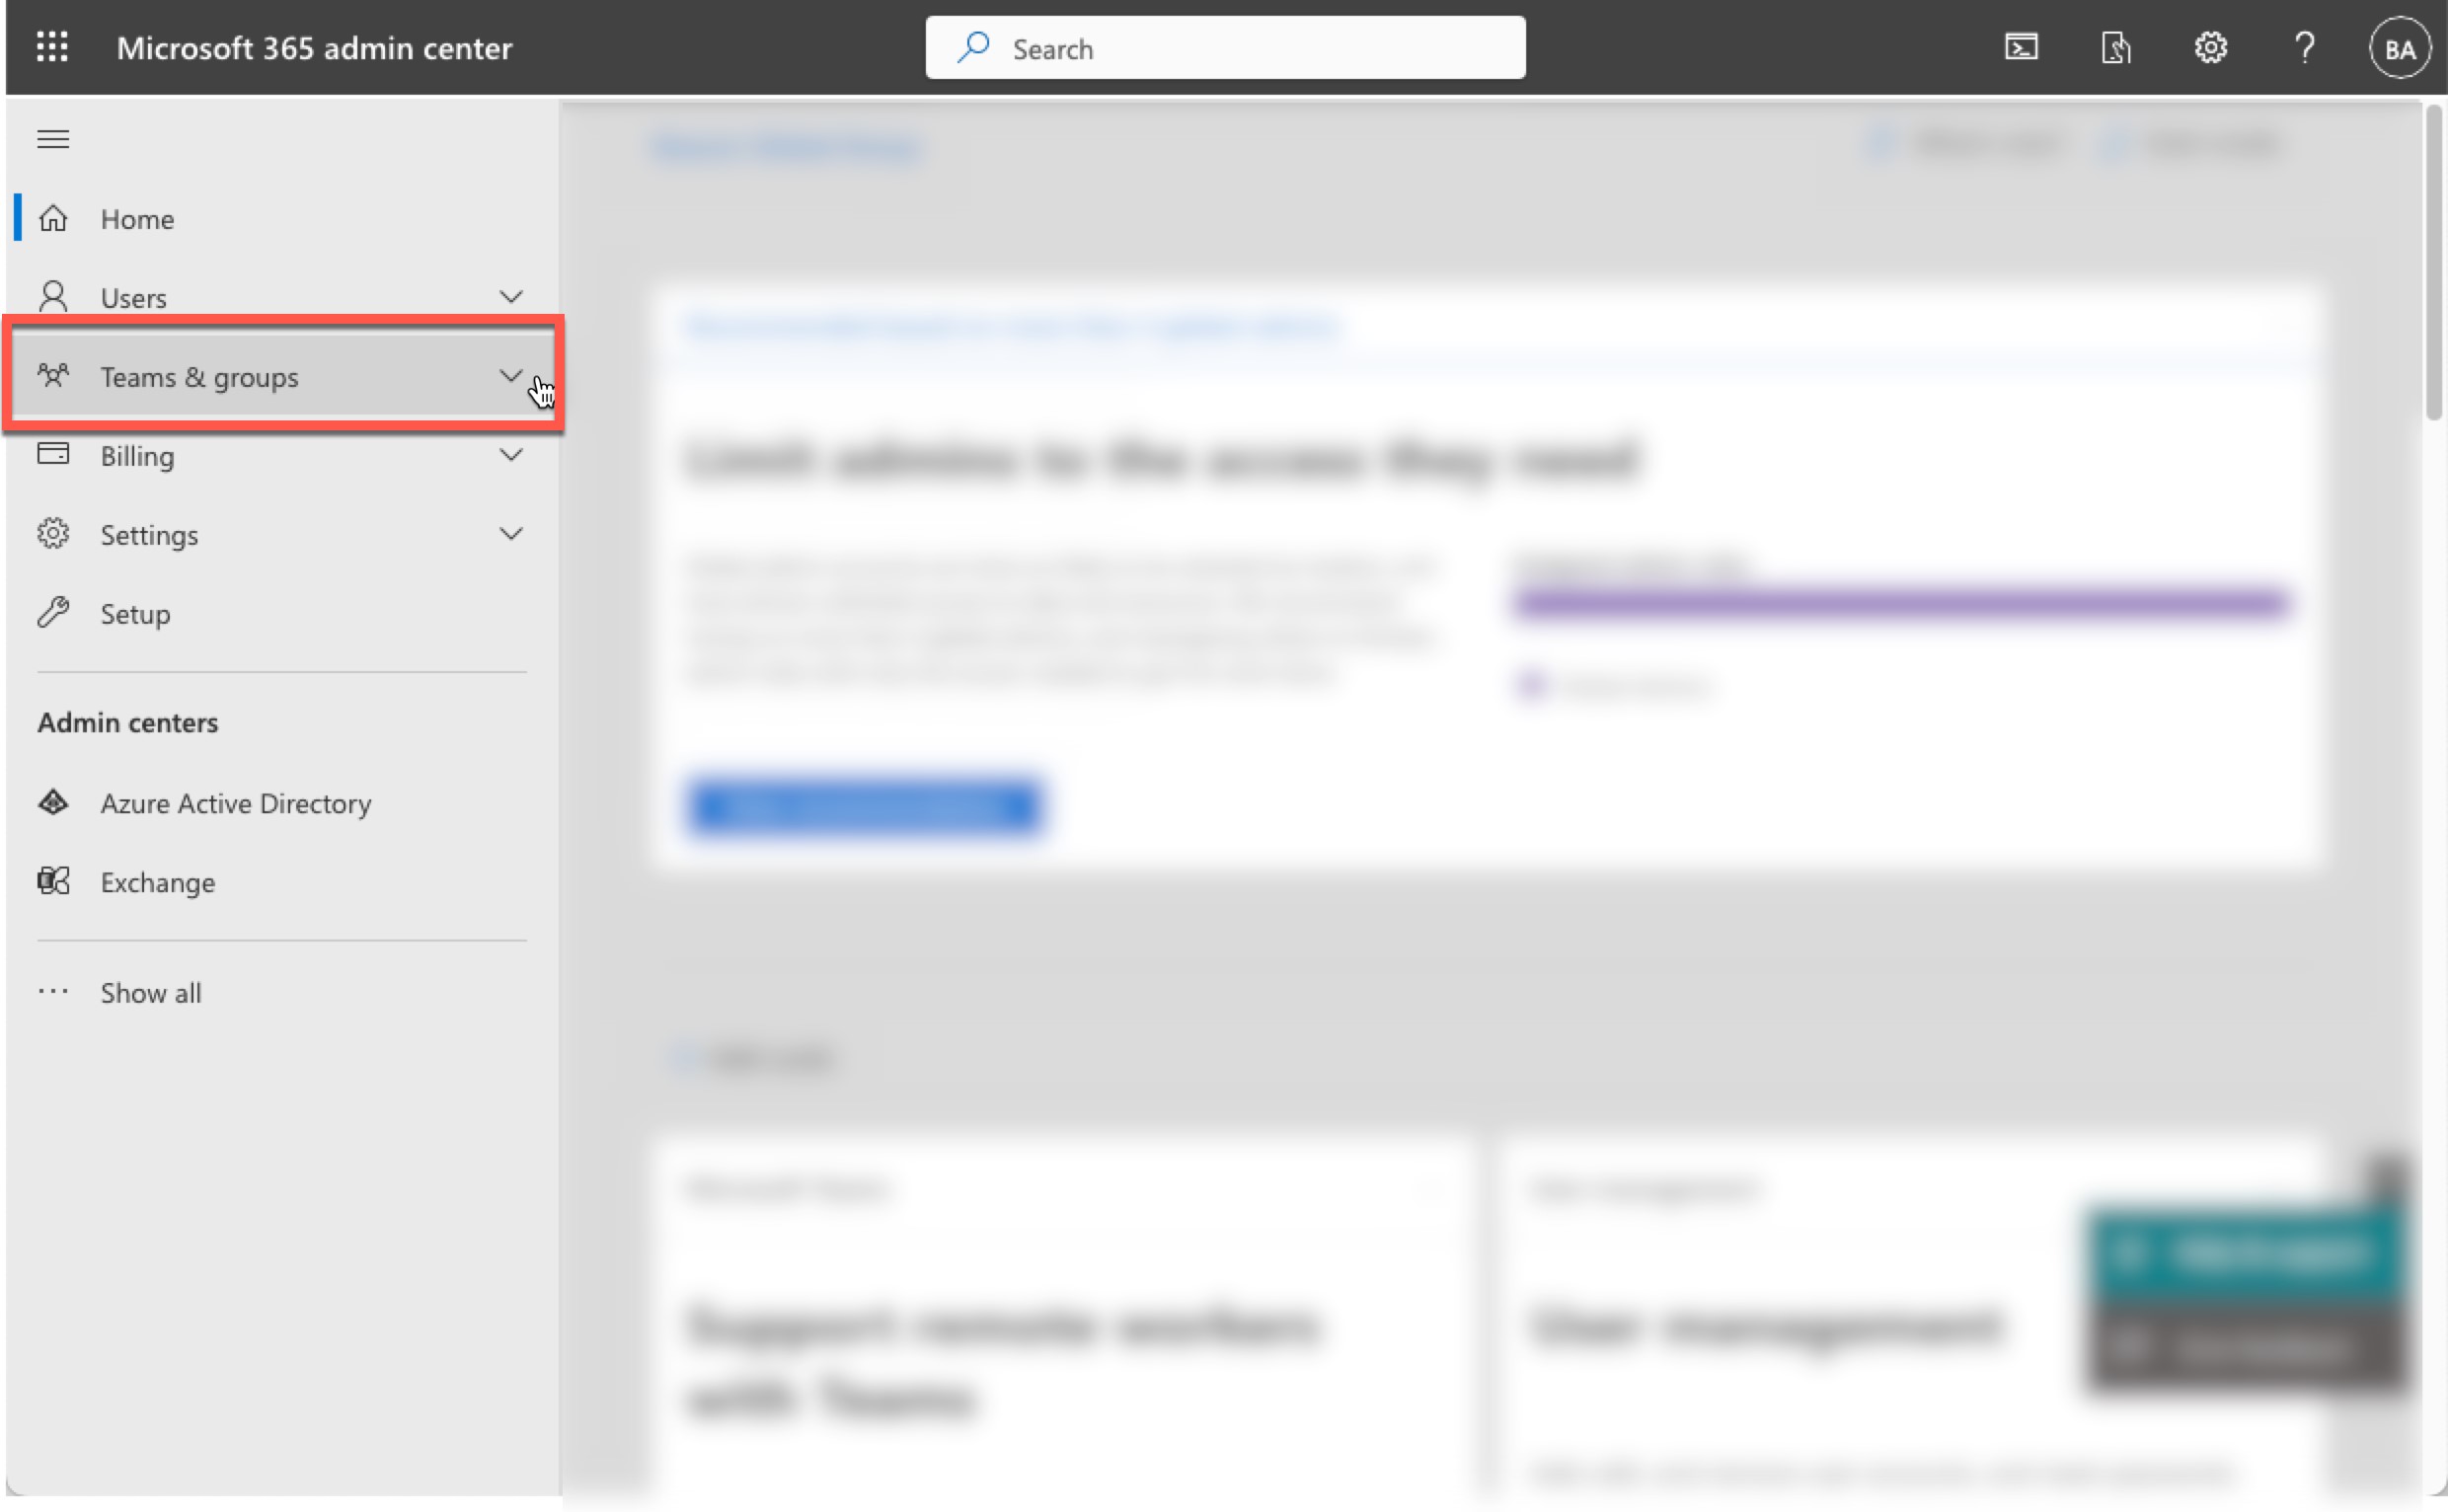
Creating a Group
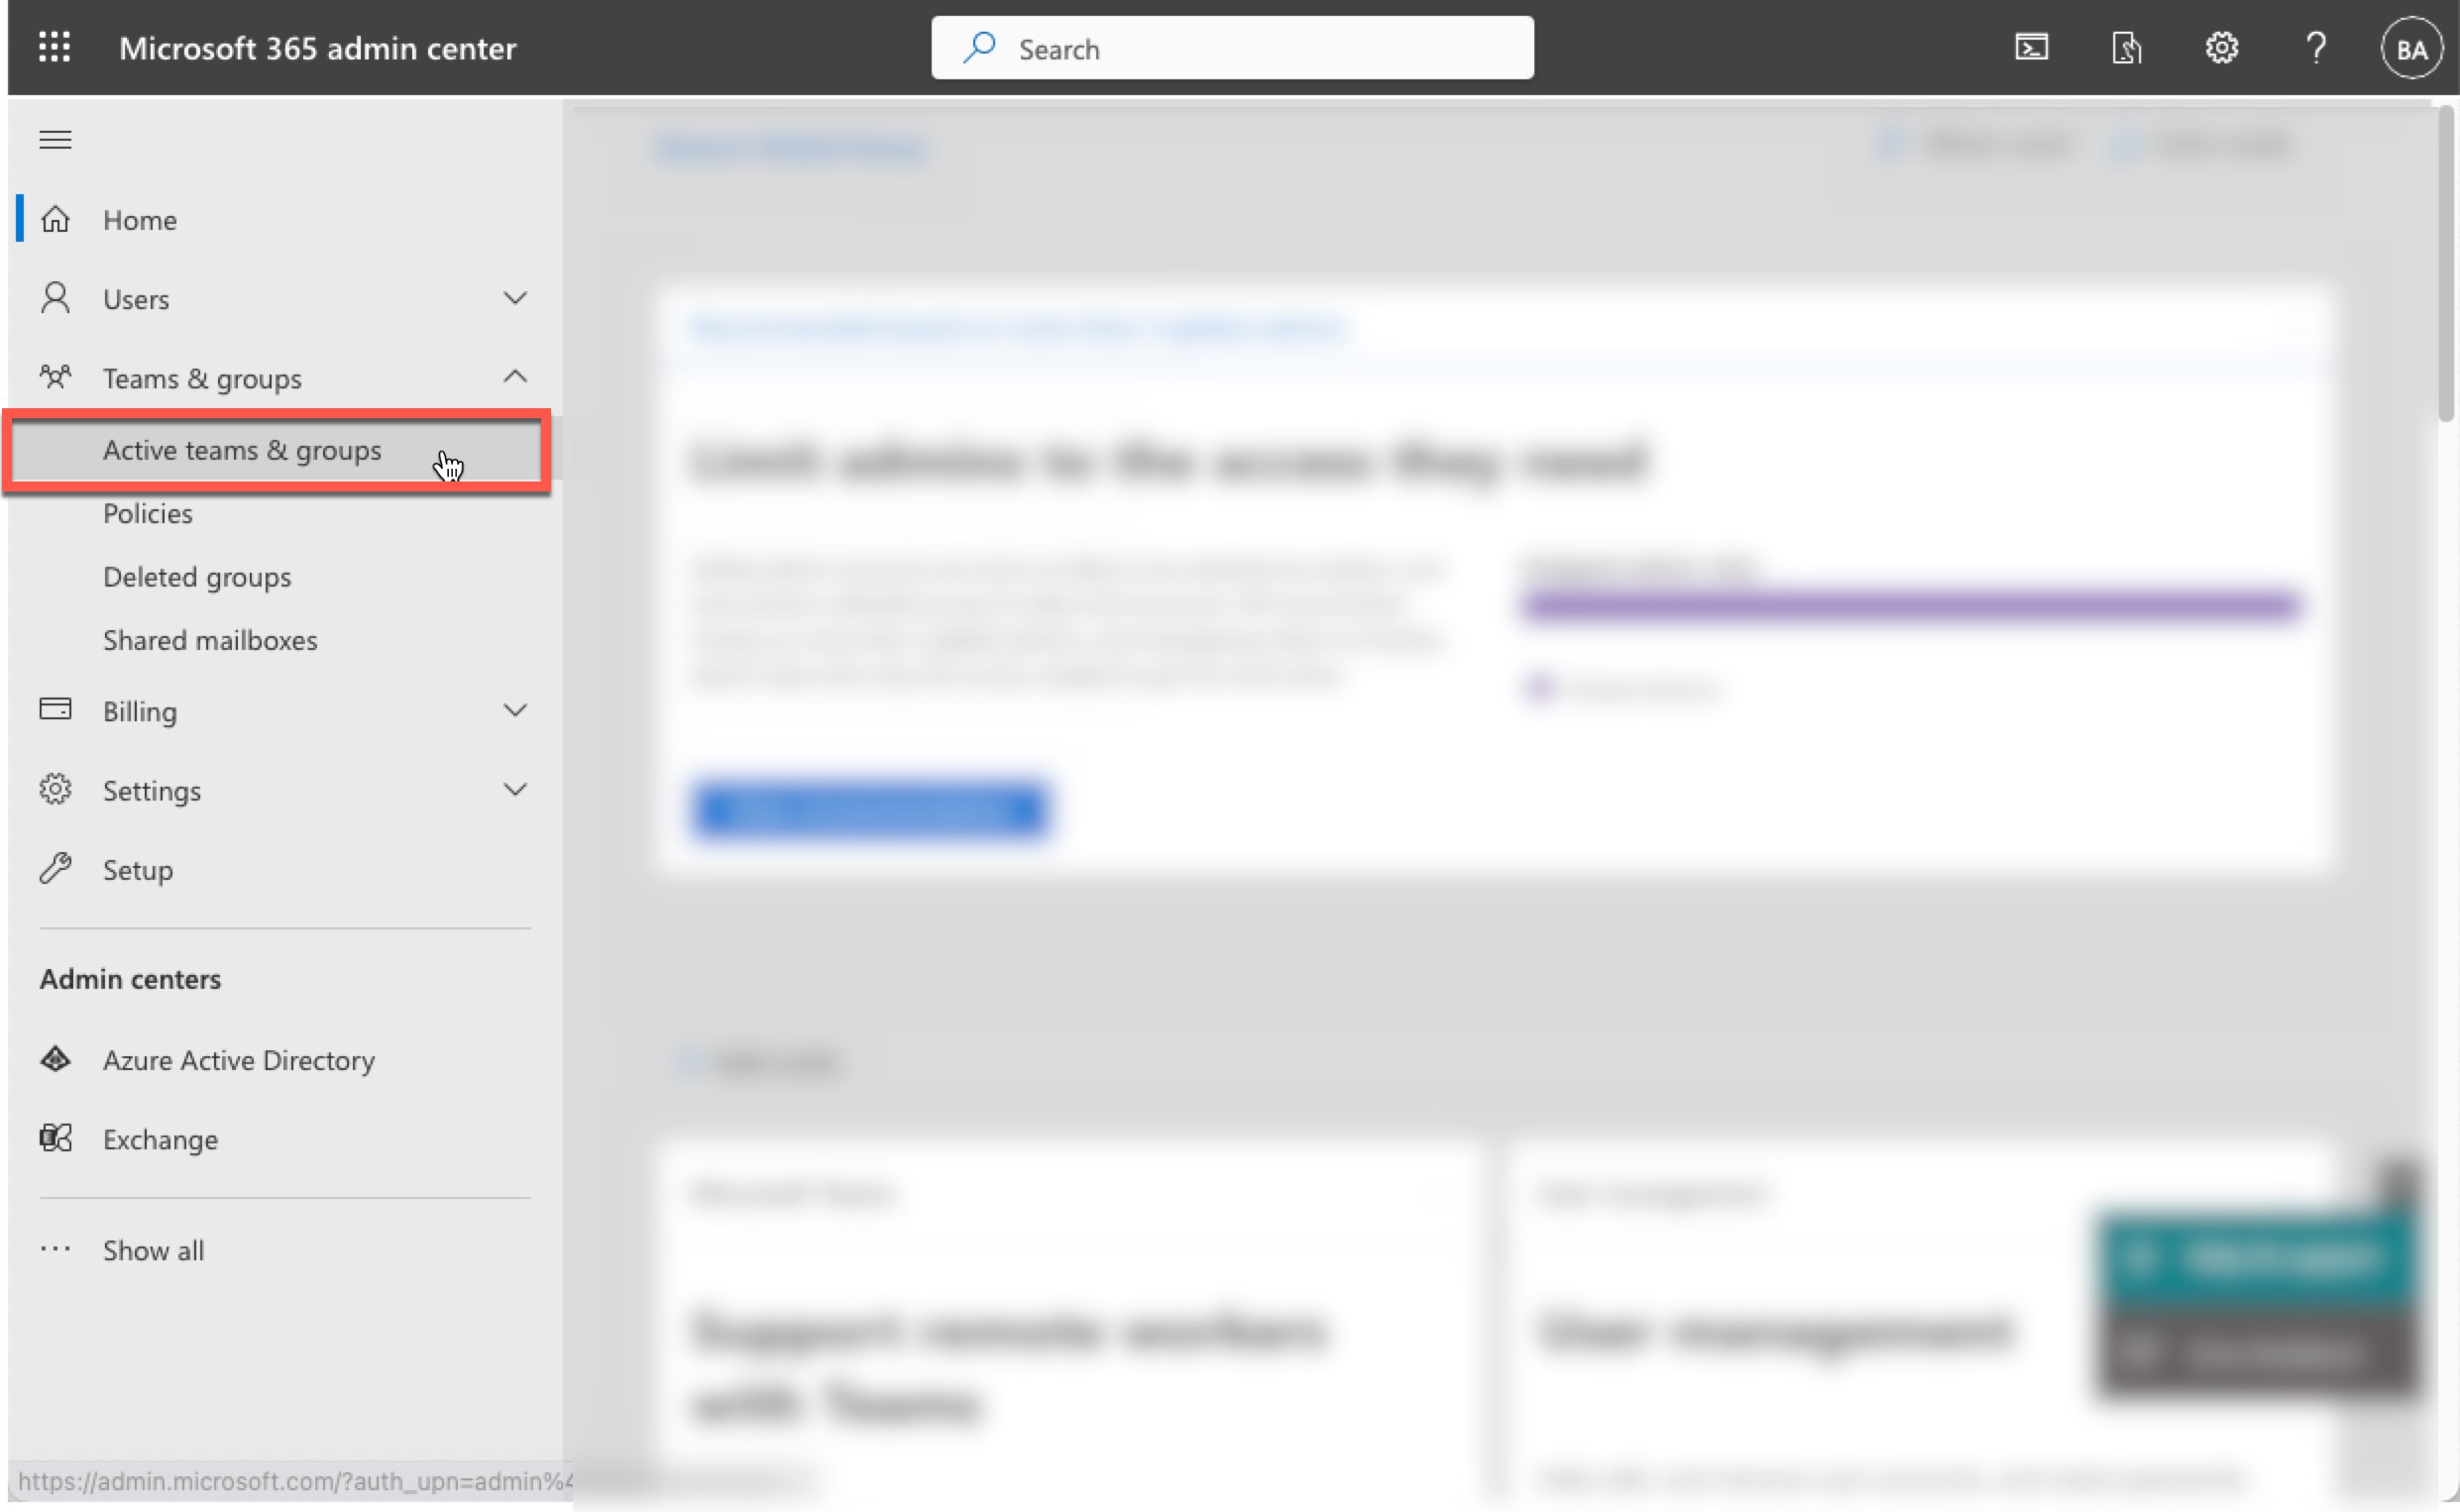
Go to https://portal.office.com and click Teams & groups
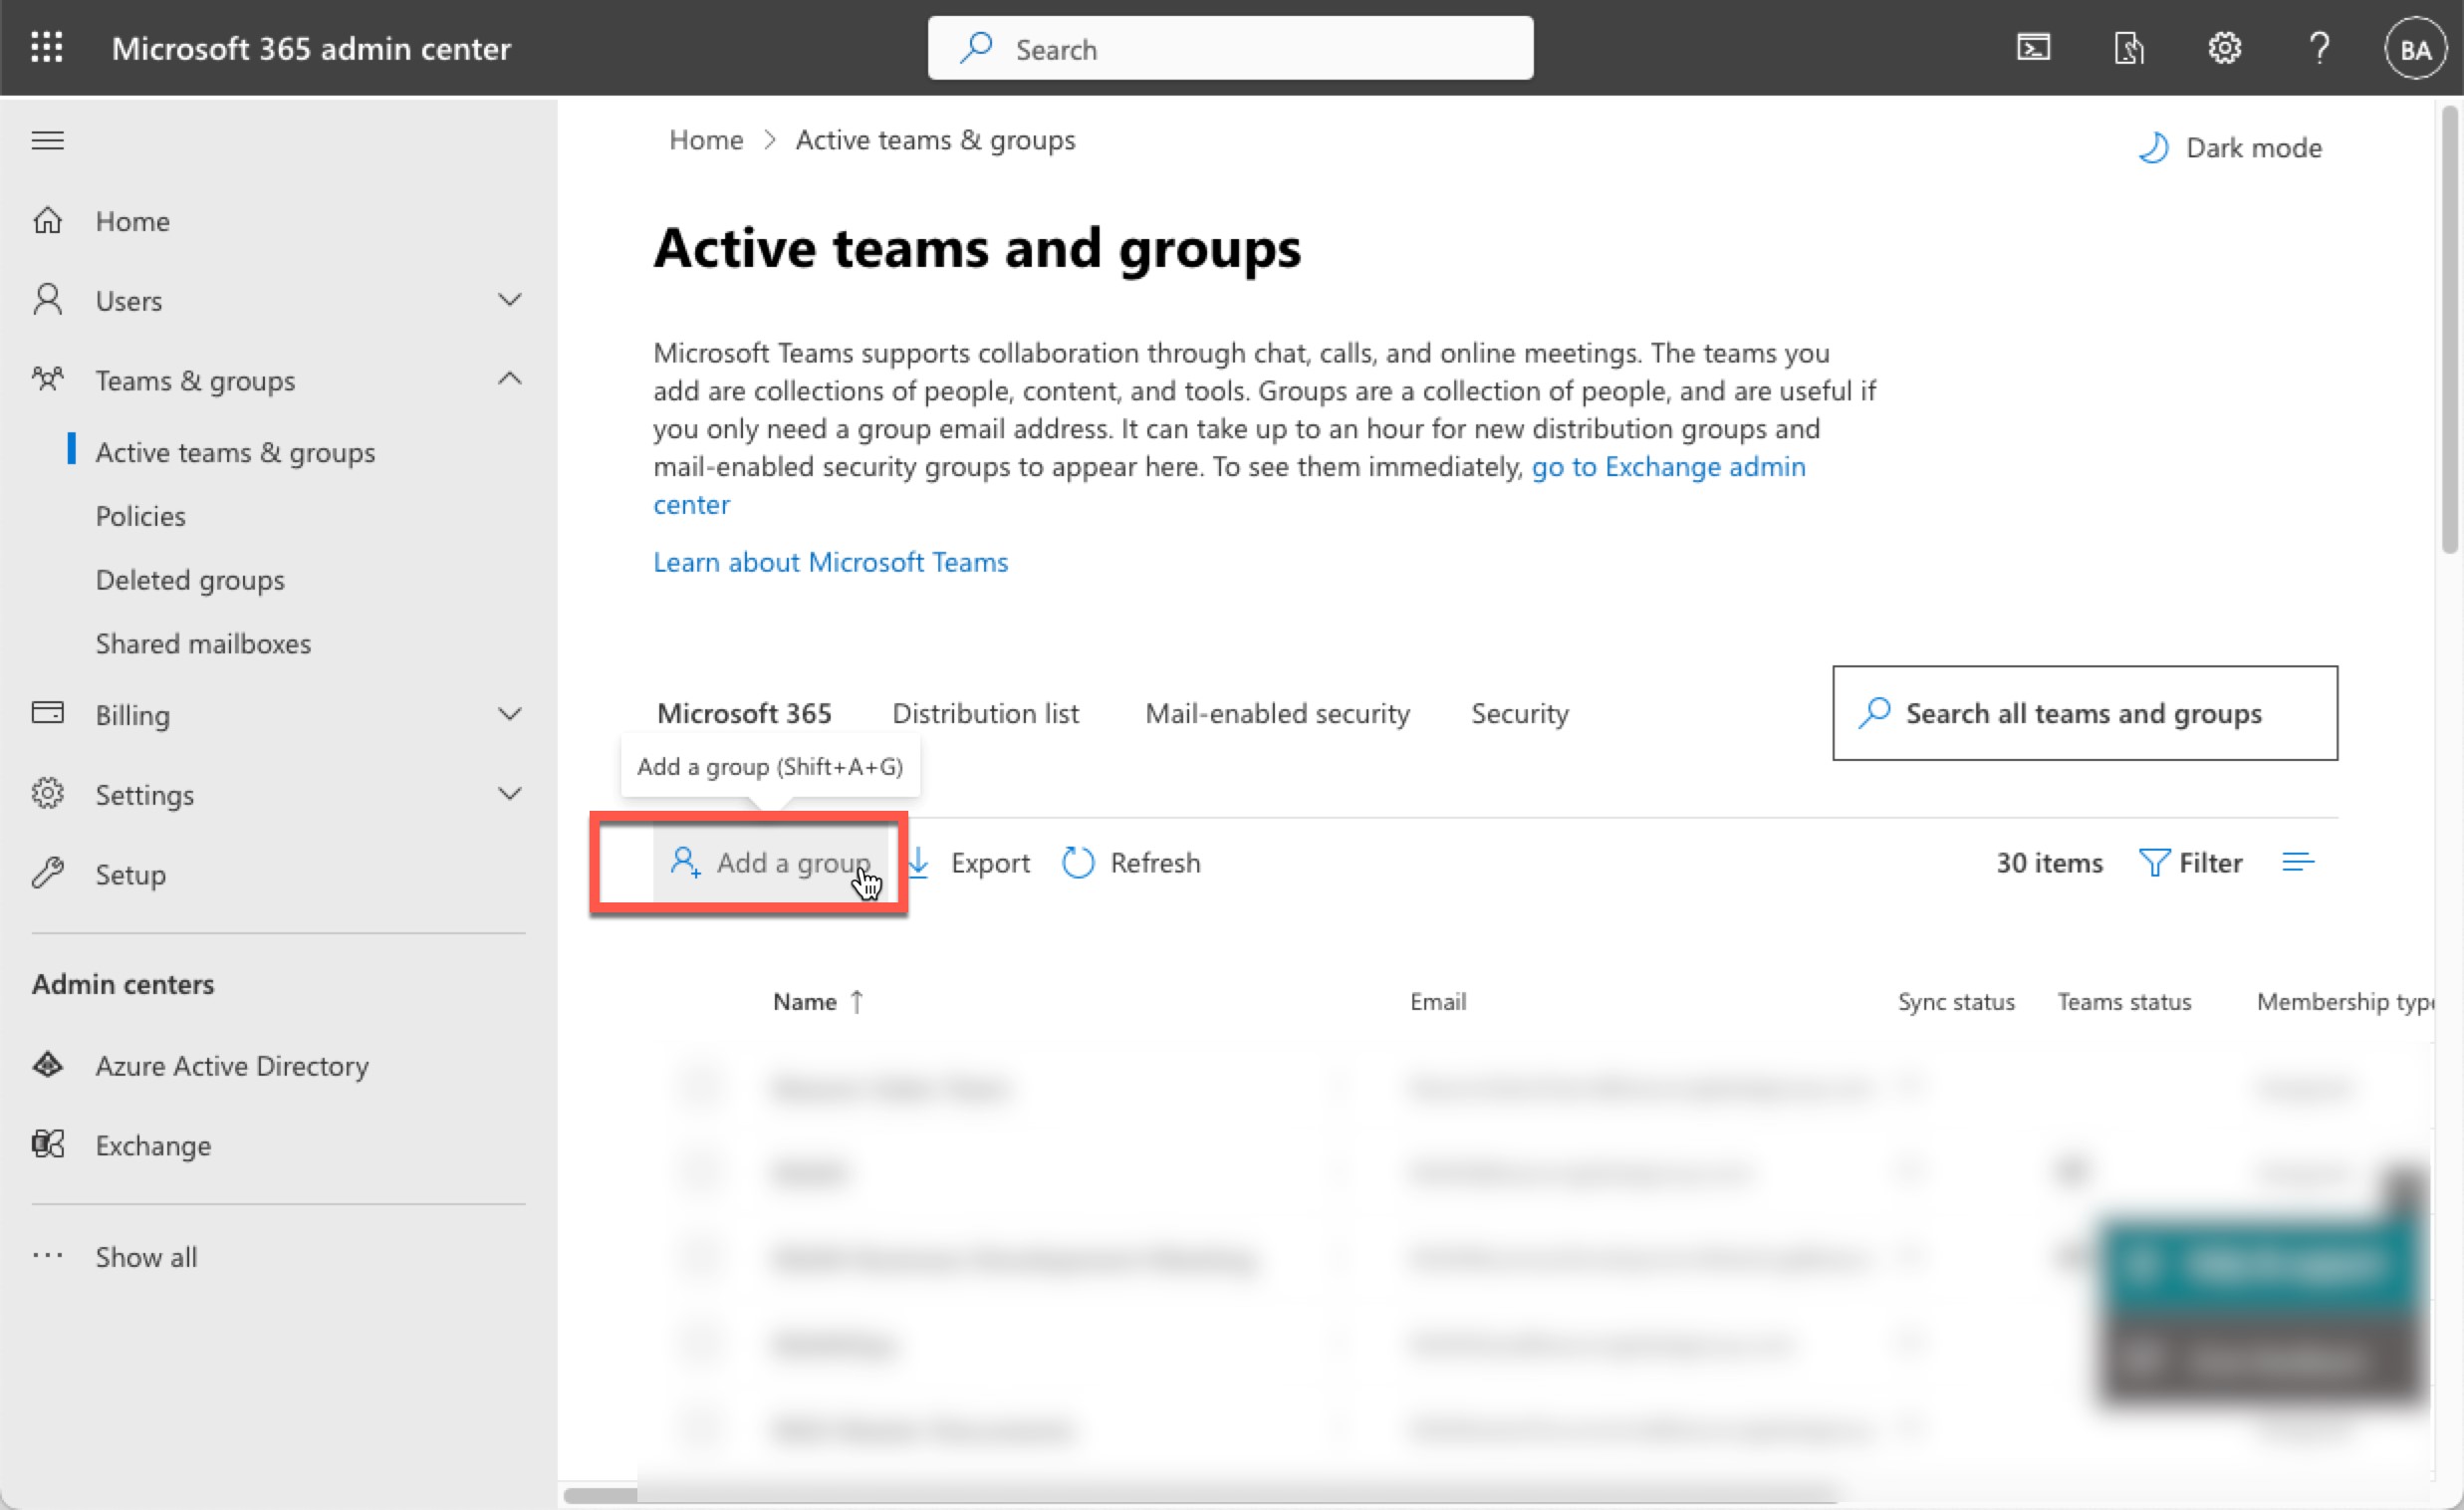
Click Active teams & groups
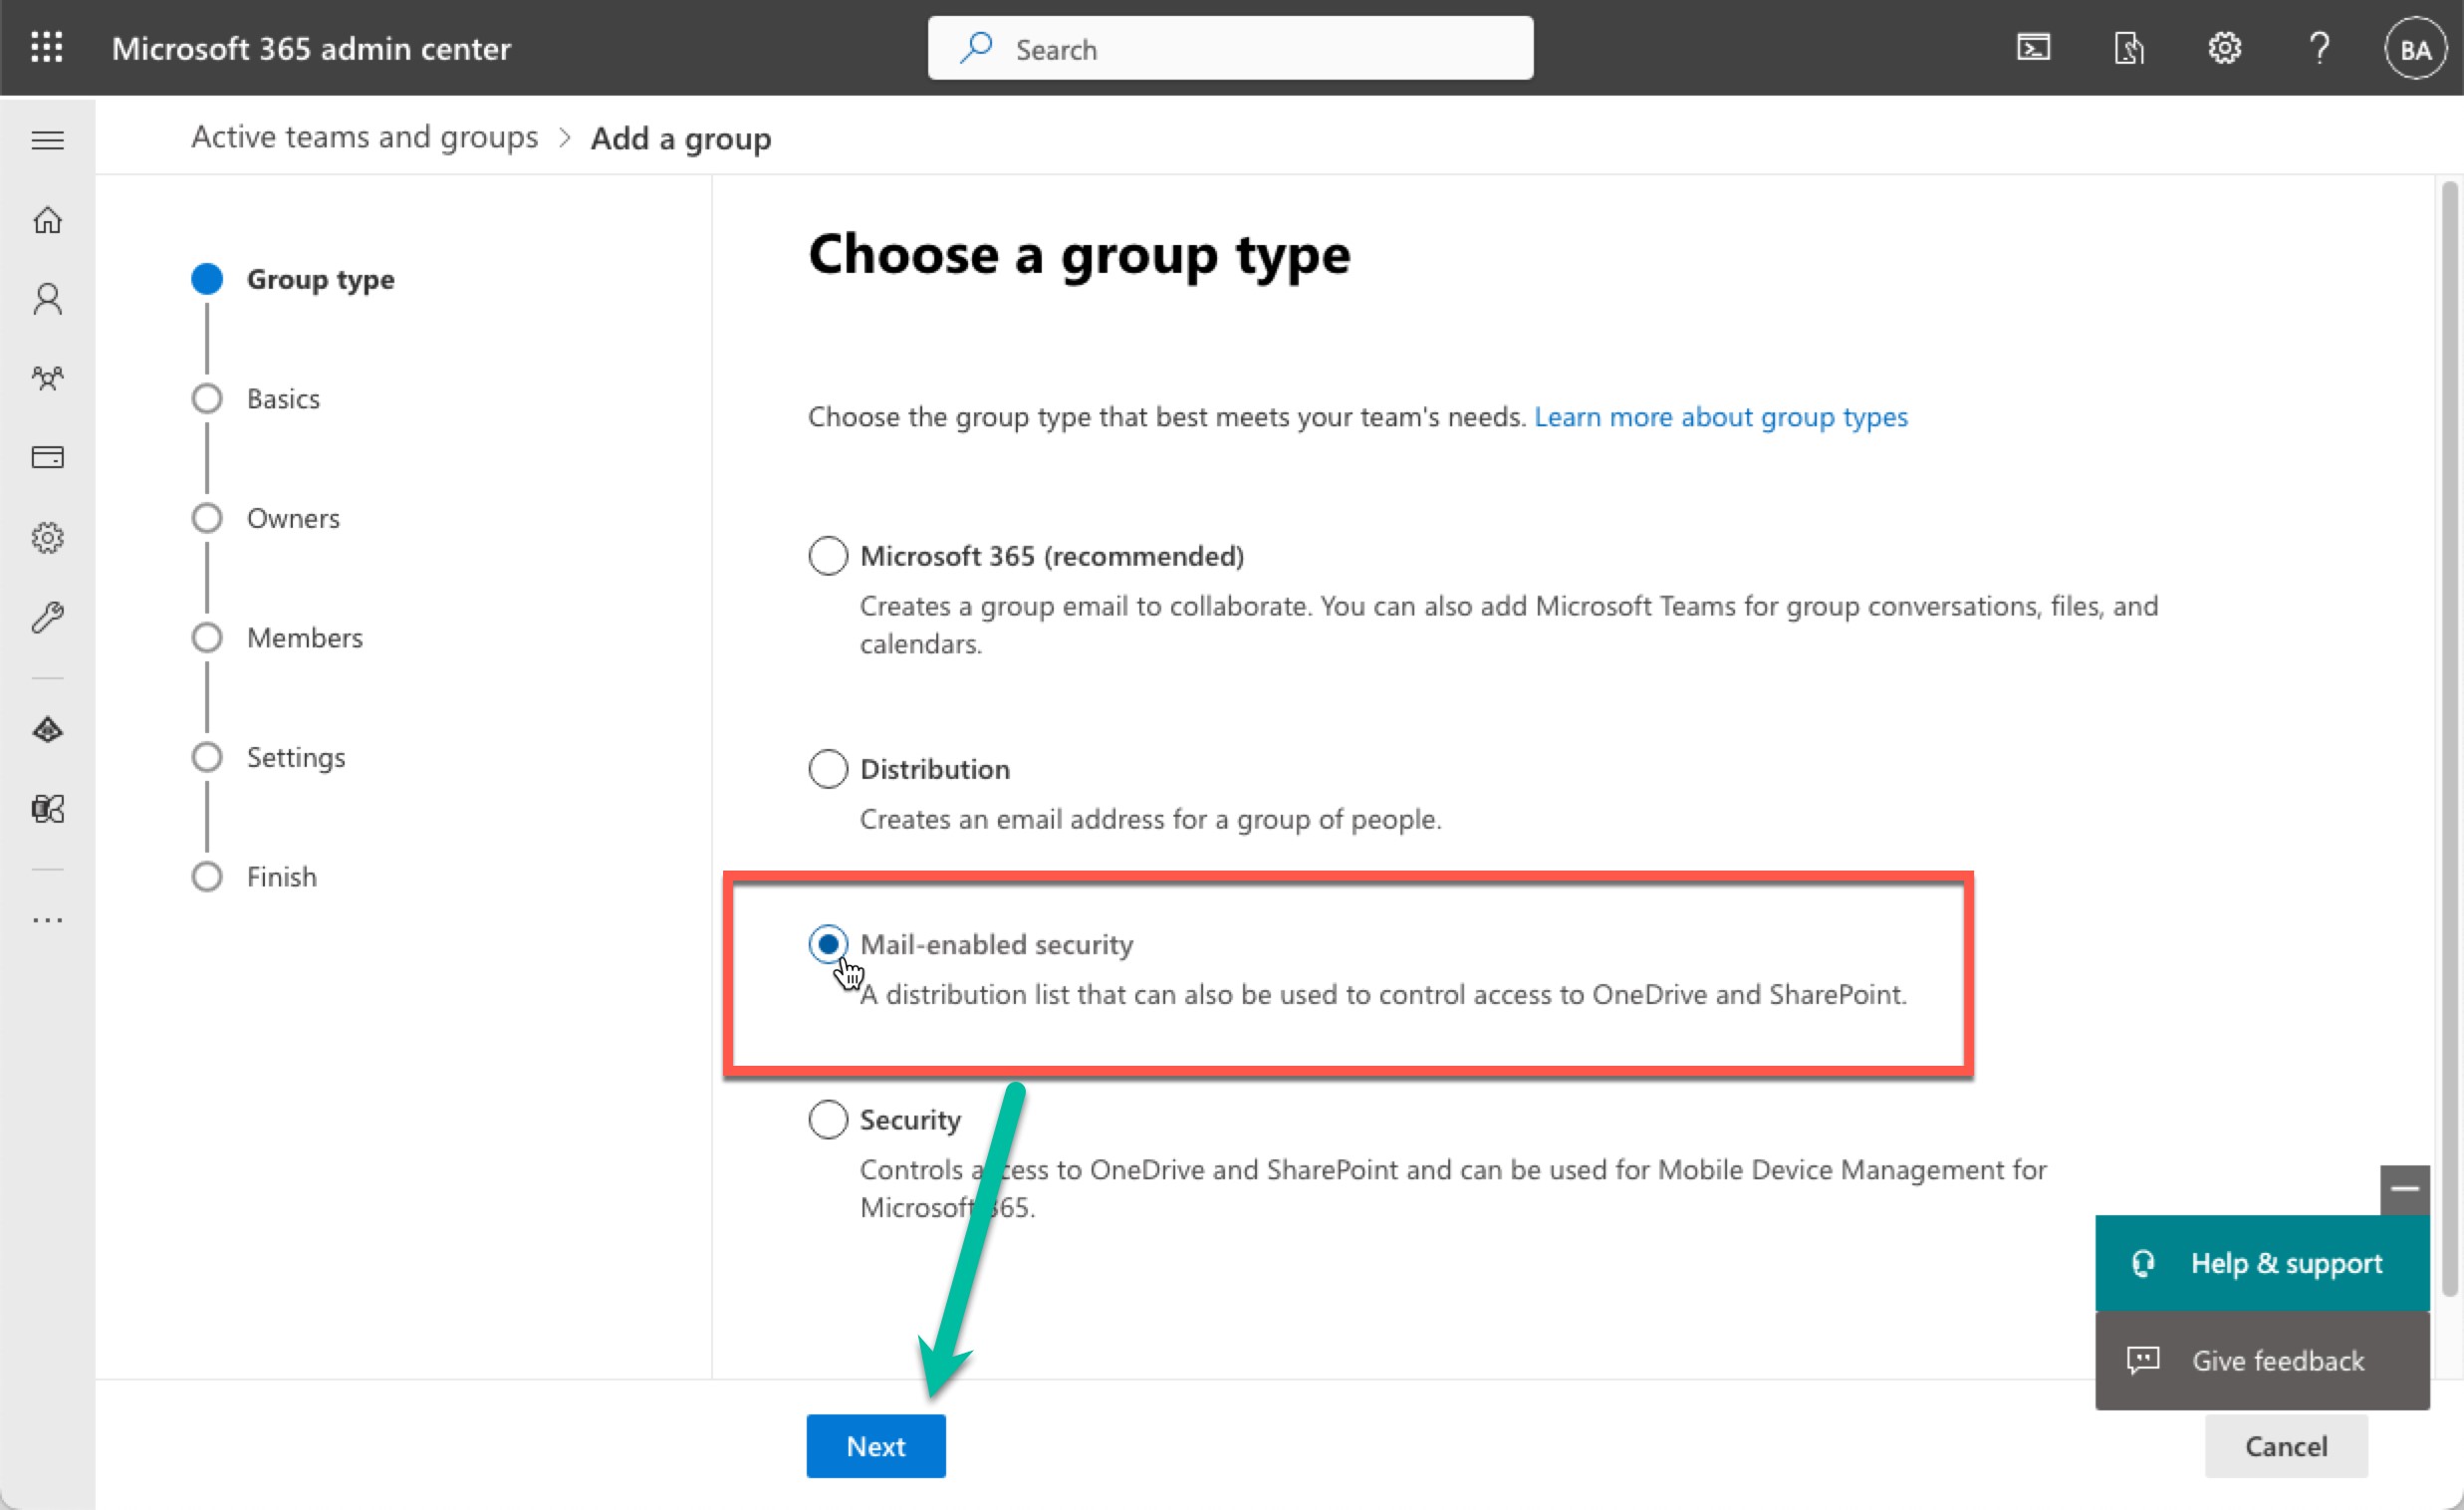
Click Add a group
Select Mail-enabled security then click Next
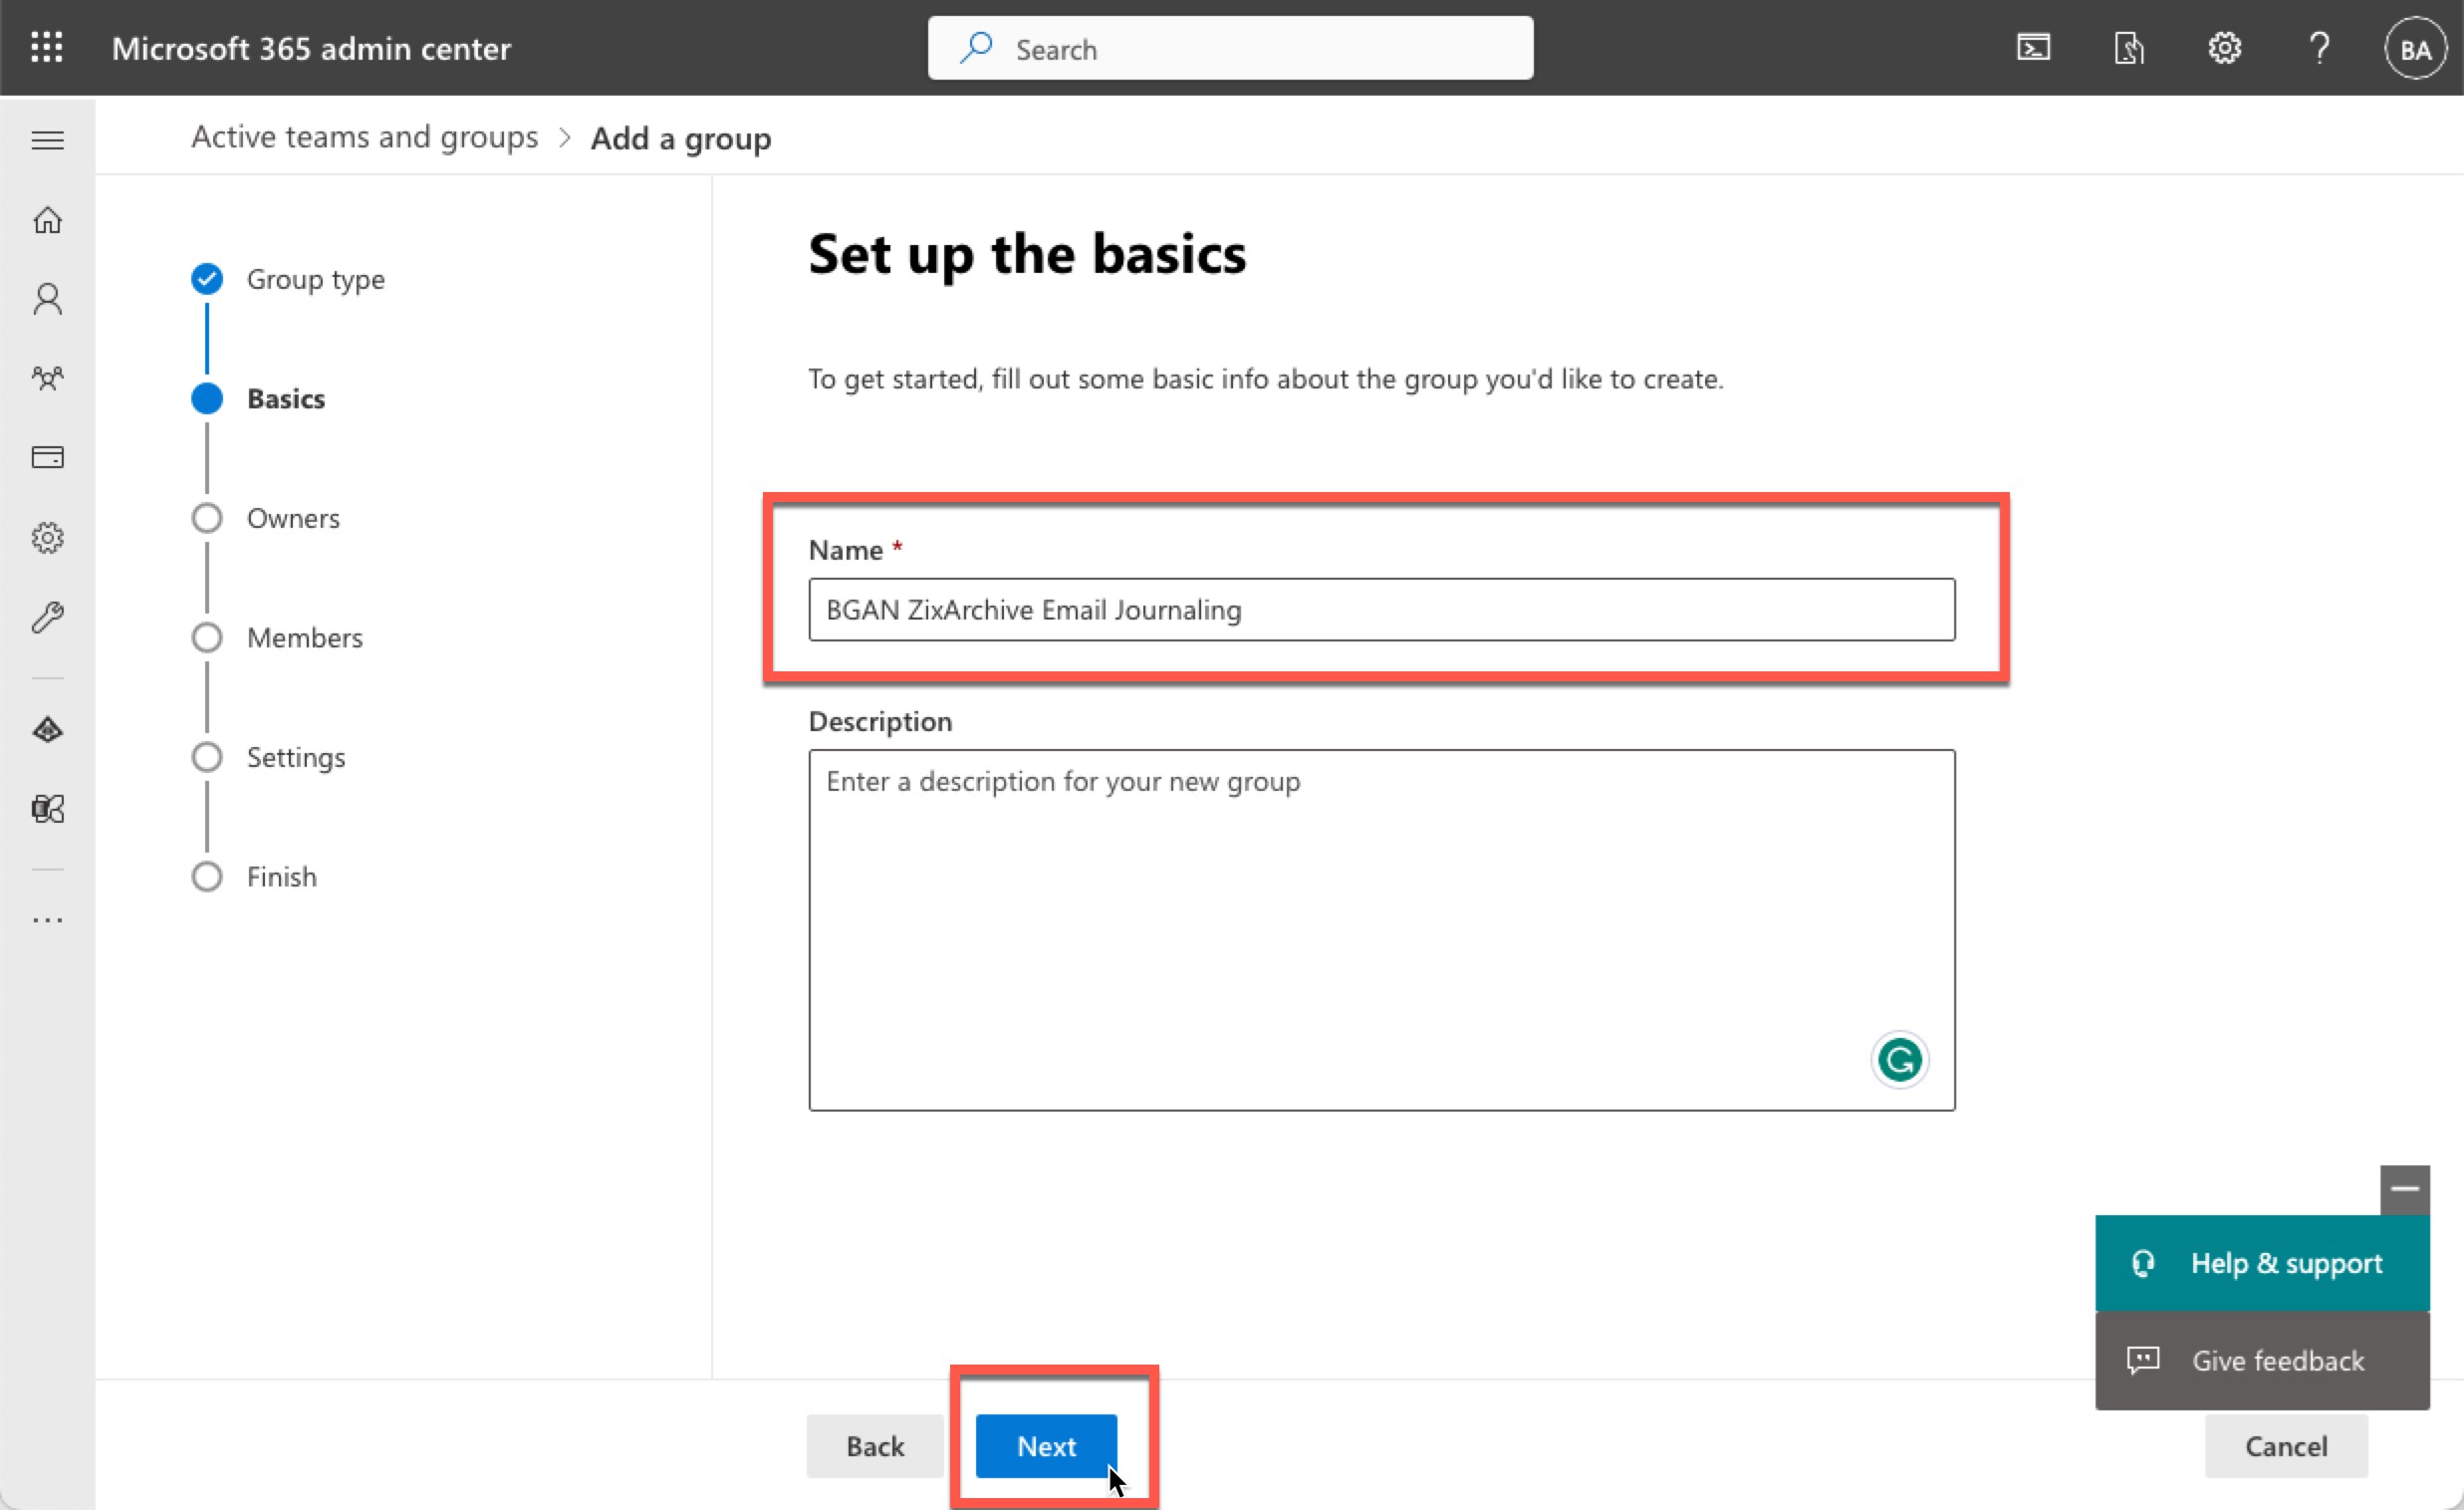
For the Name, enter BGAN ZixArchive Email Journaling then click Next.
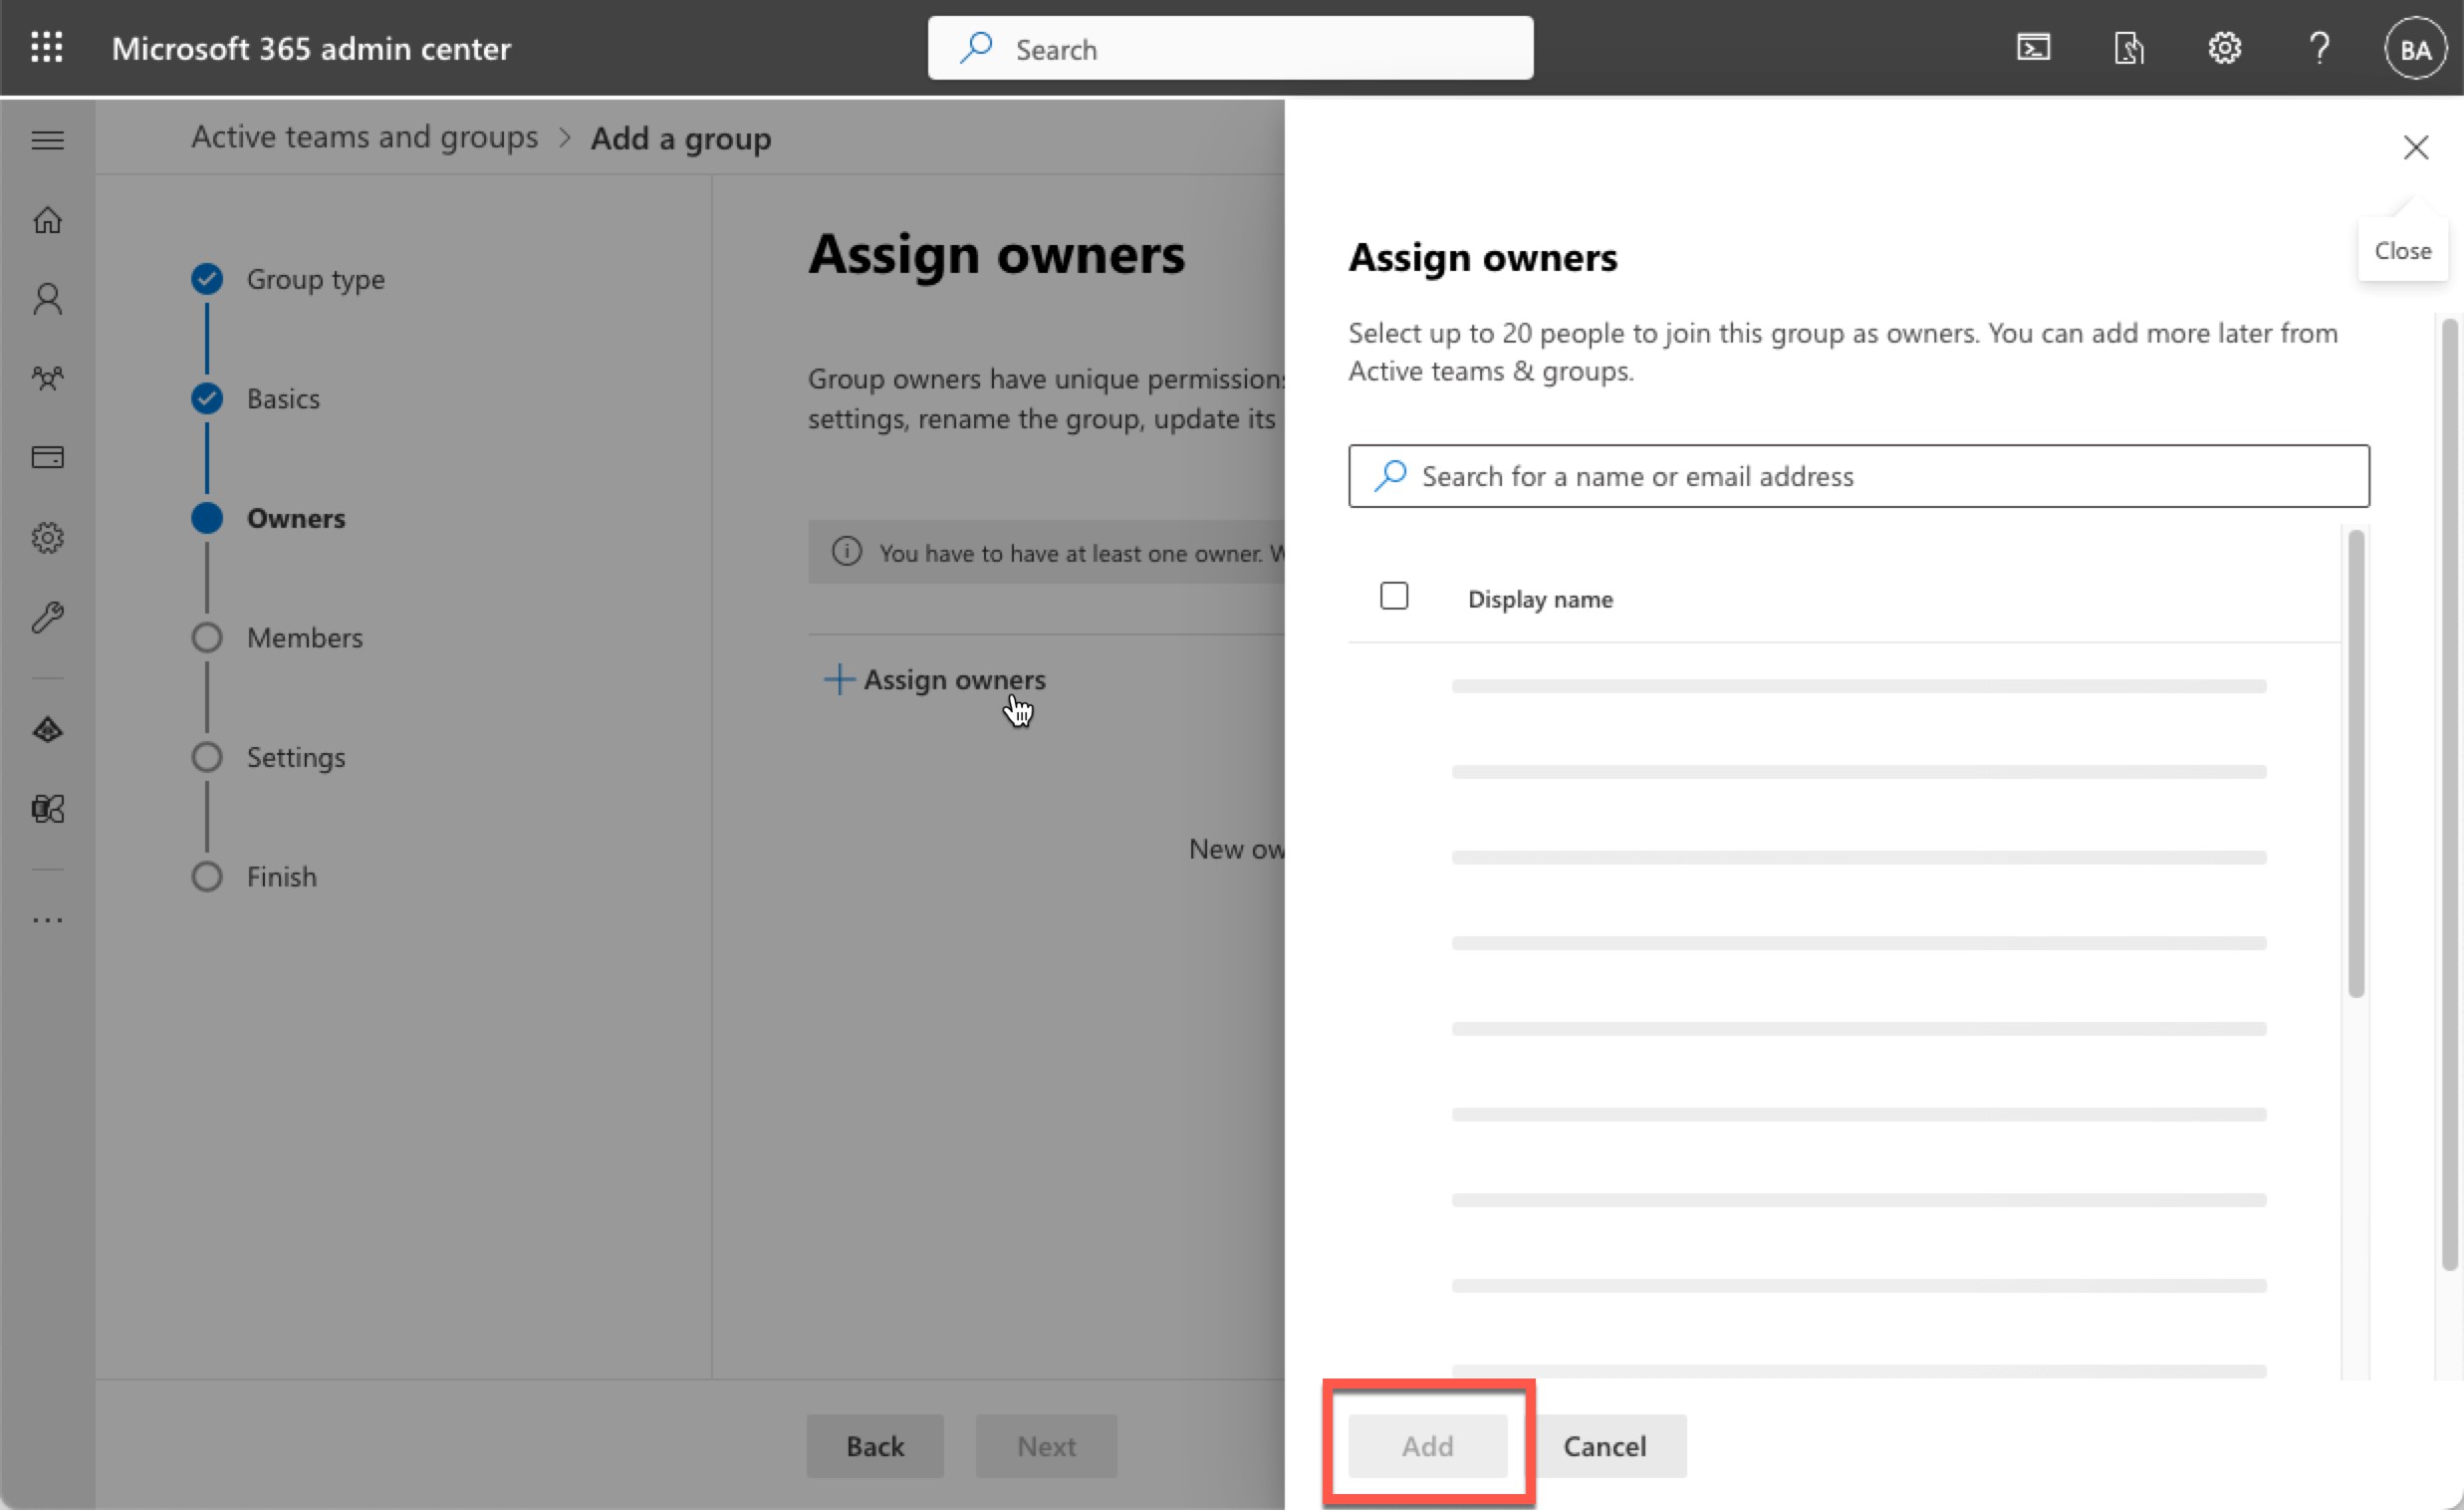
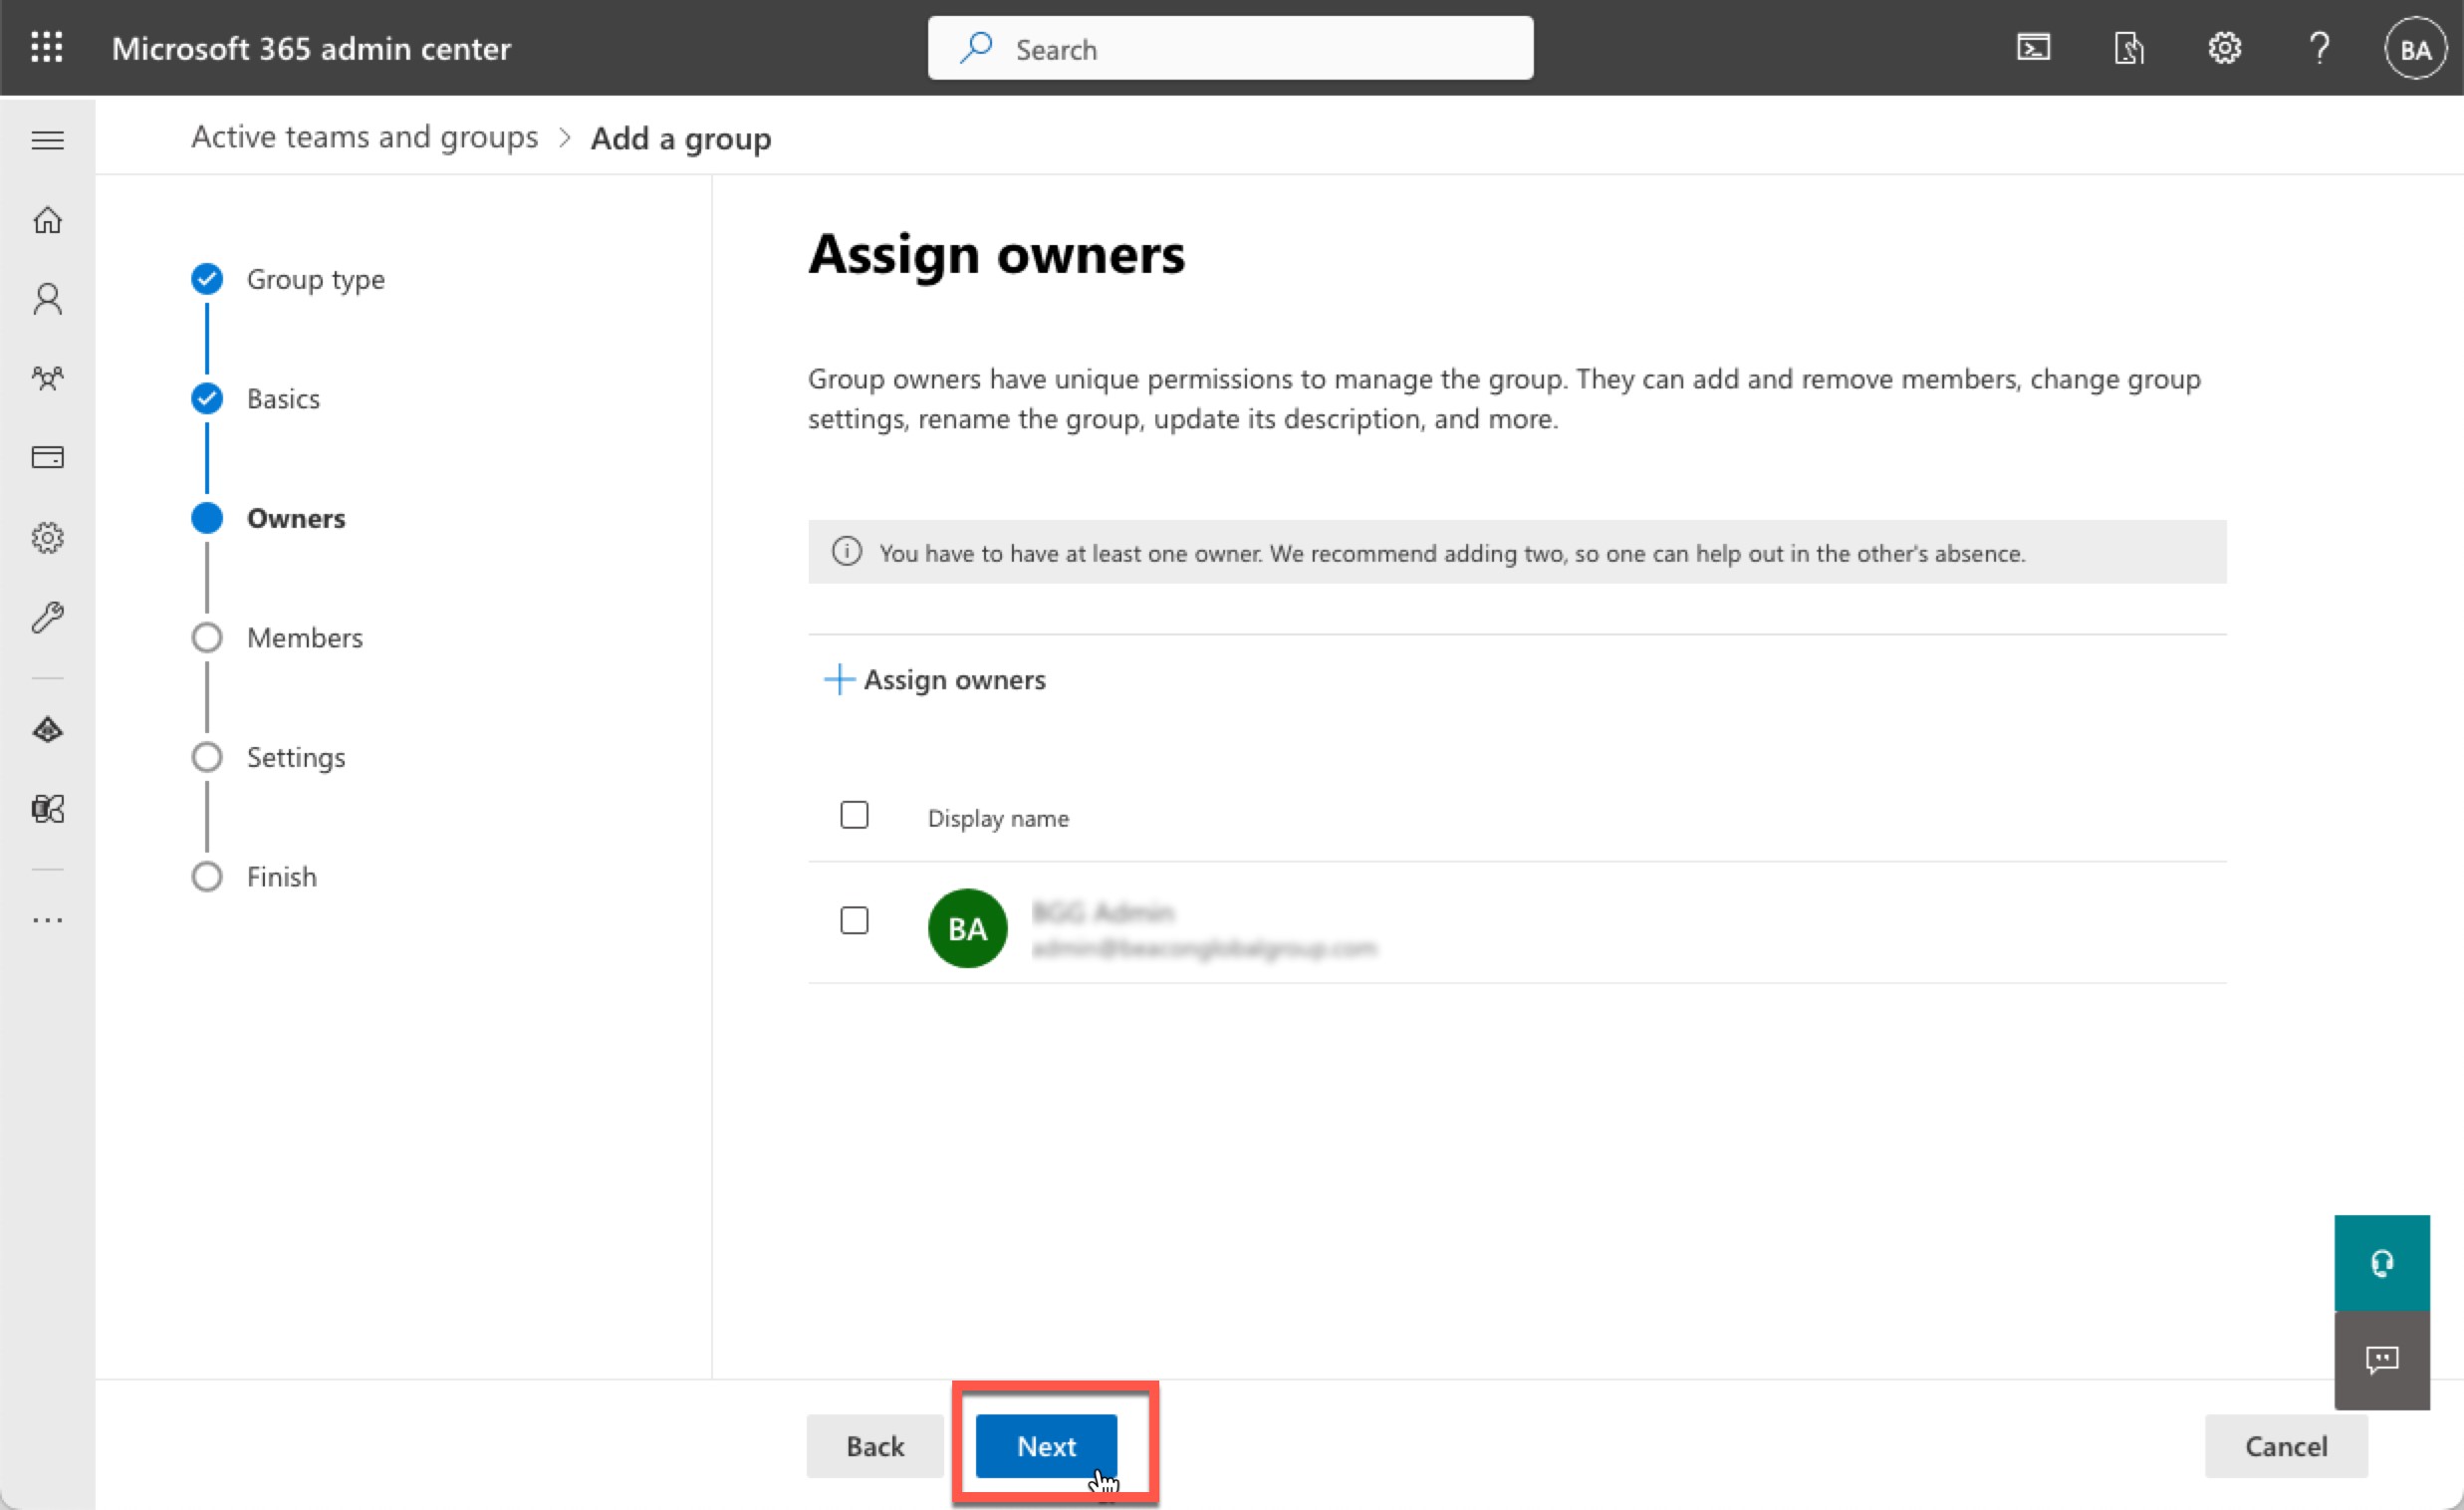
Assign Administrator Owners. Once an owner is selected, the Add button will turn blue, then click it to move to the next step.
Click Next
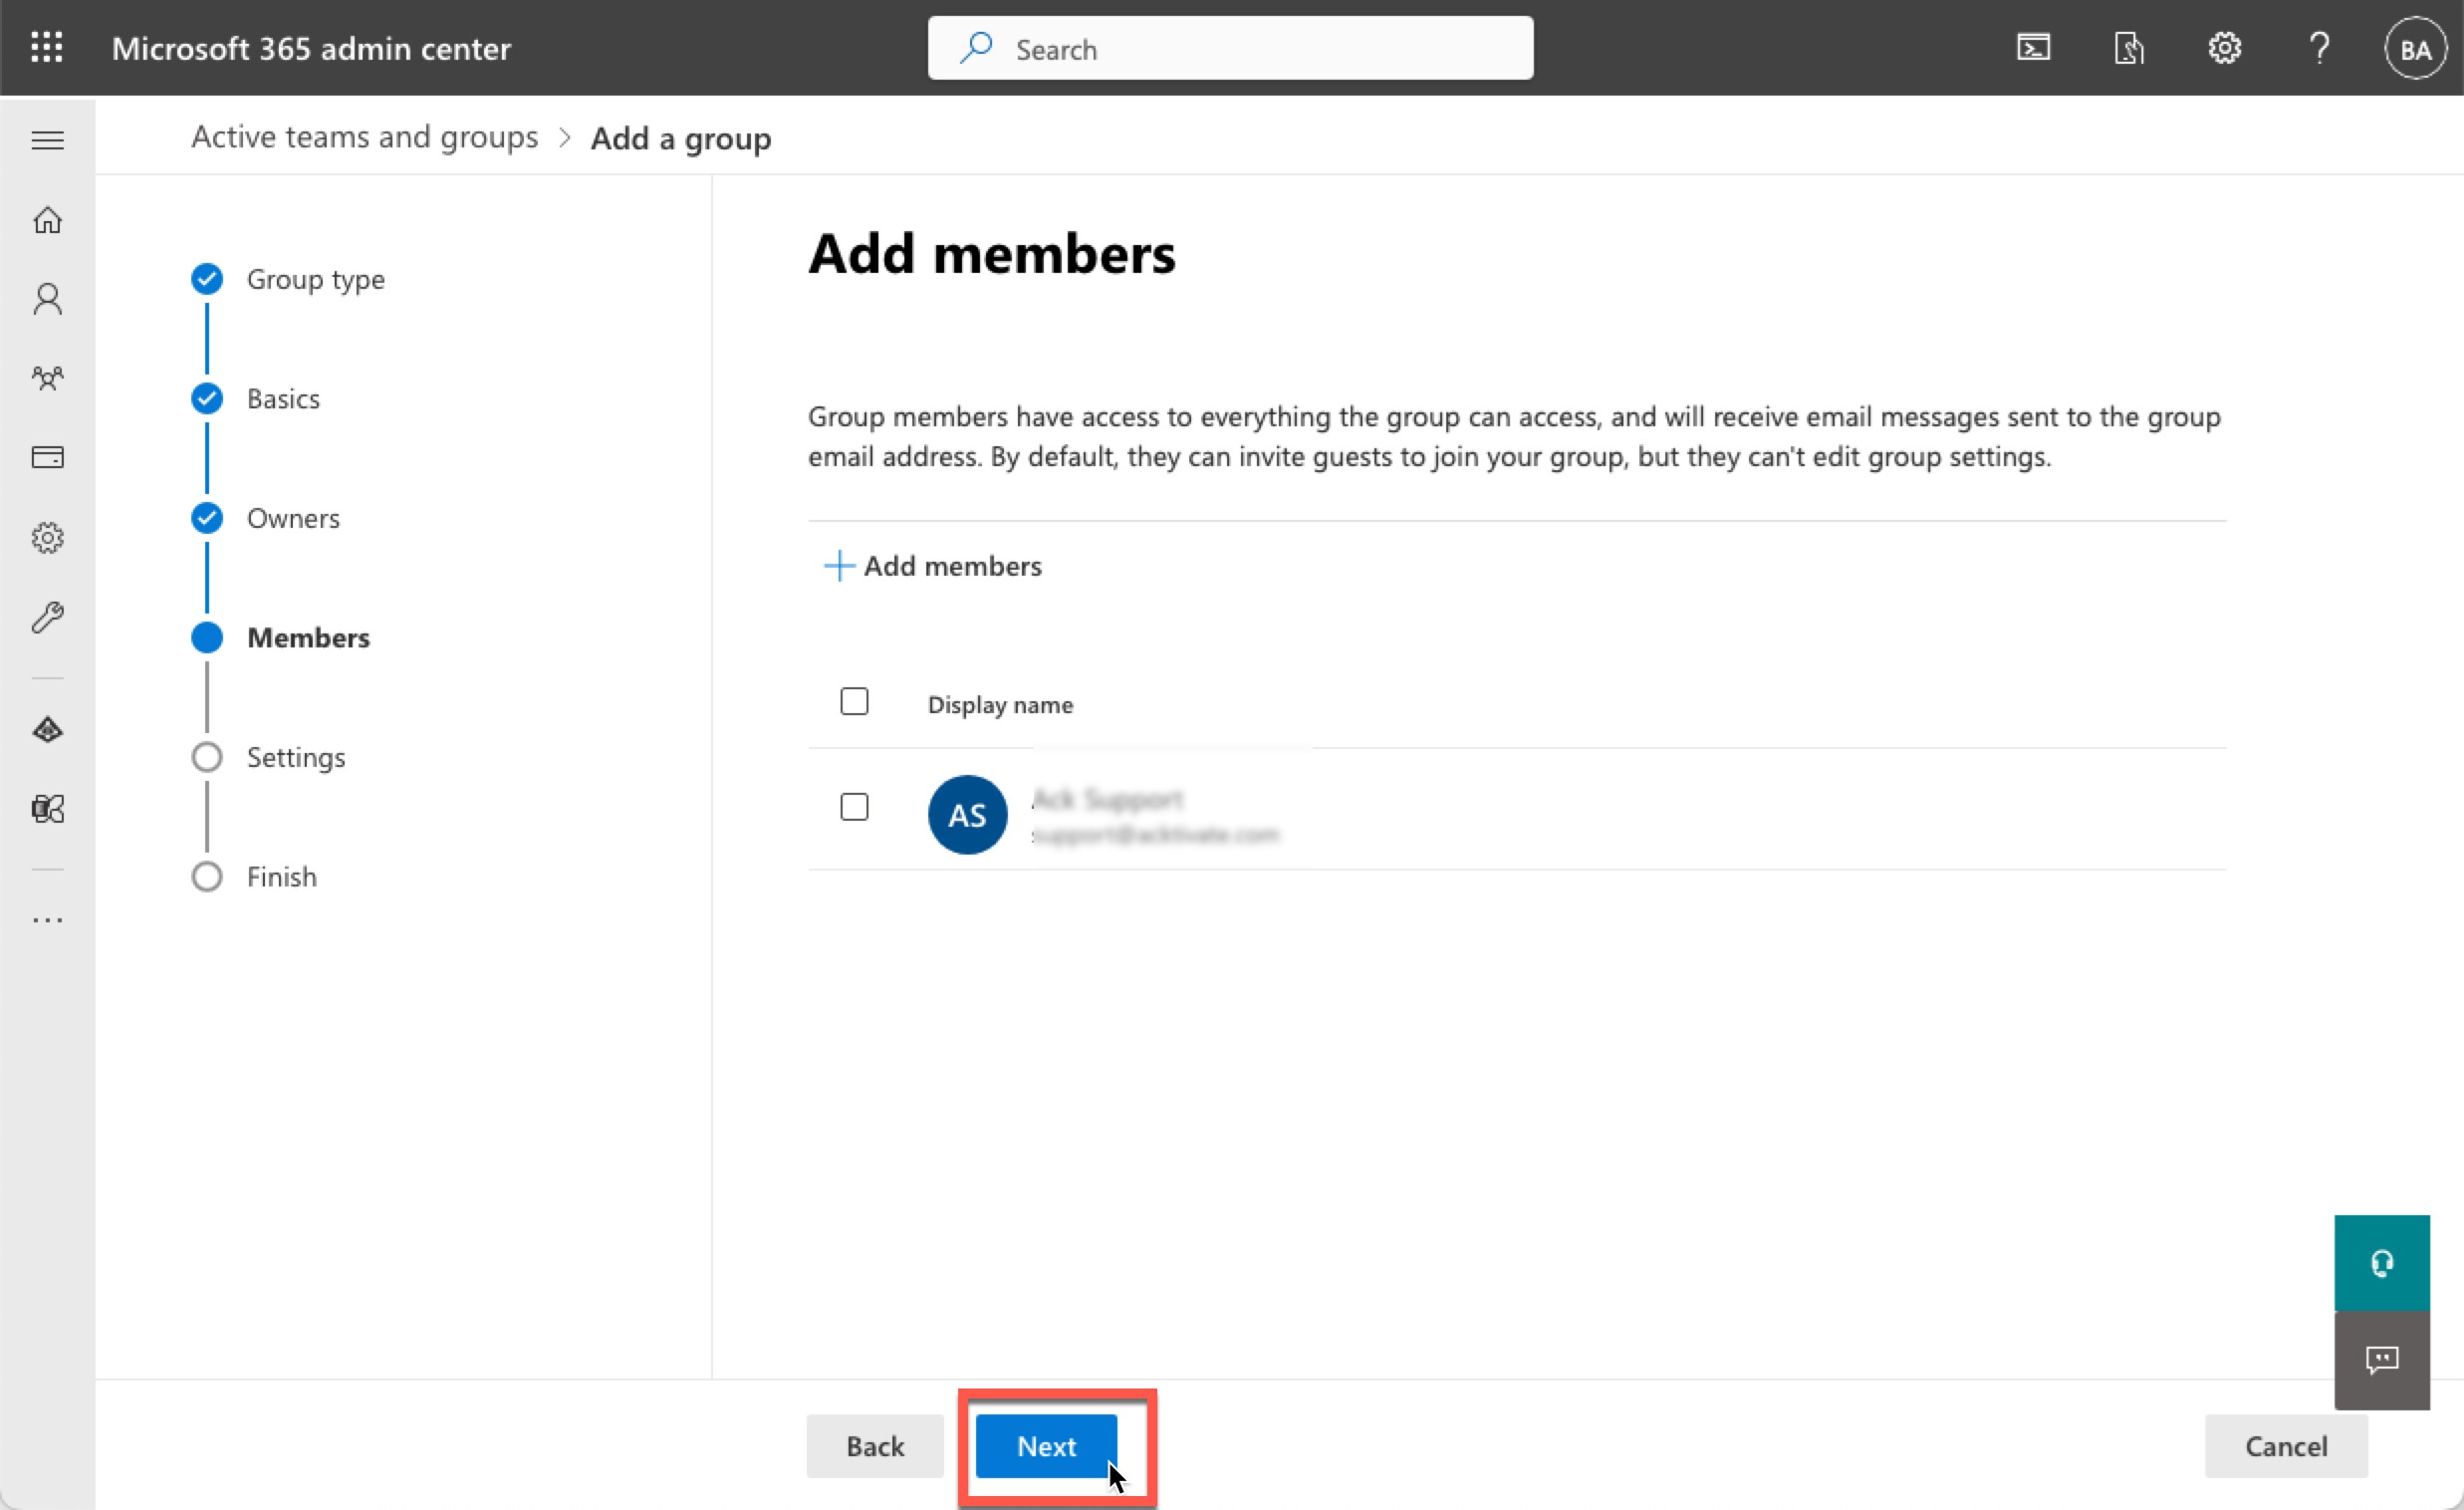
Similar to adding owners, click + Add members
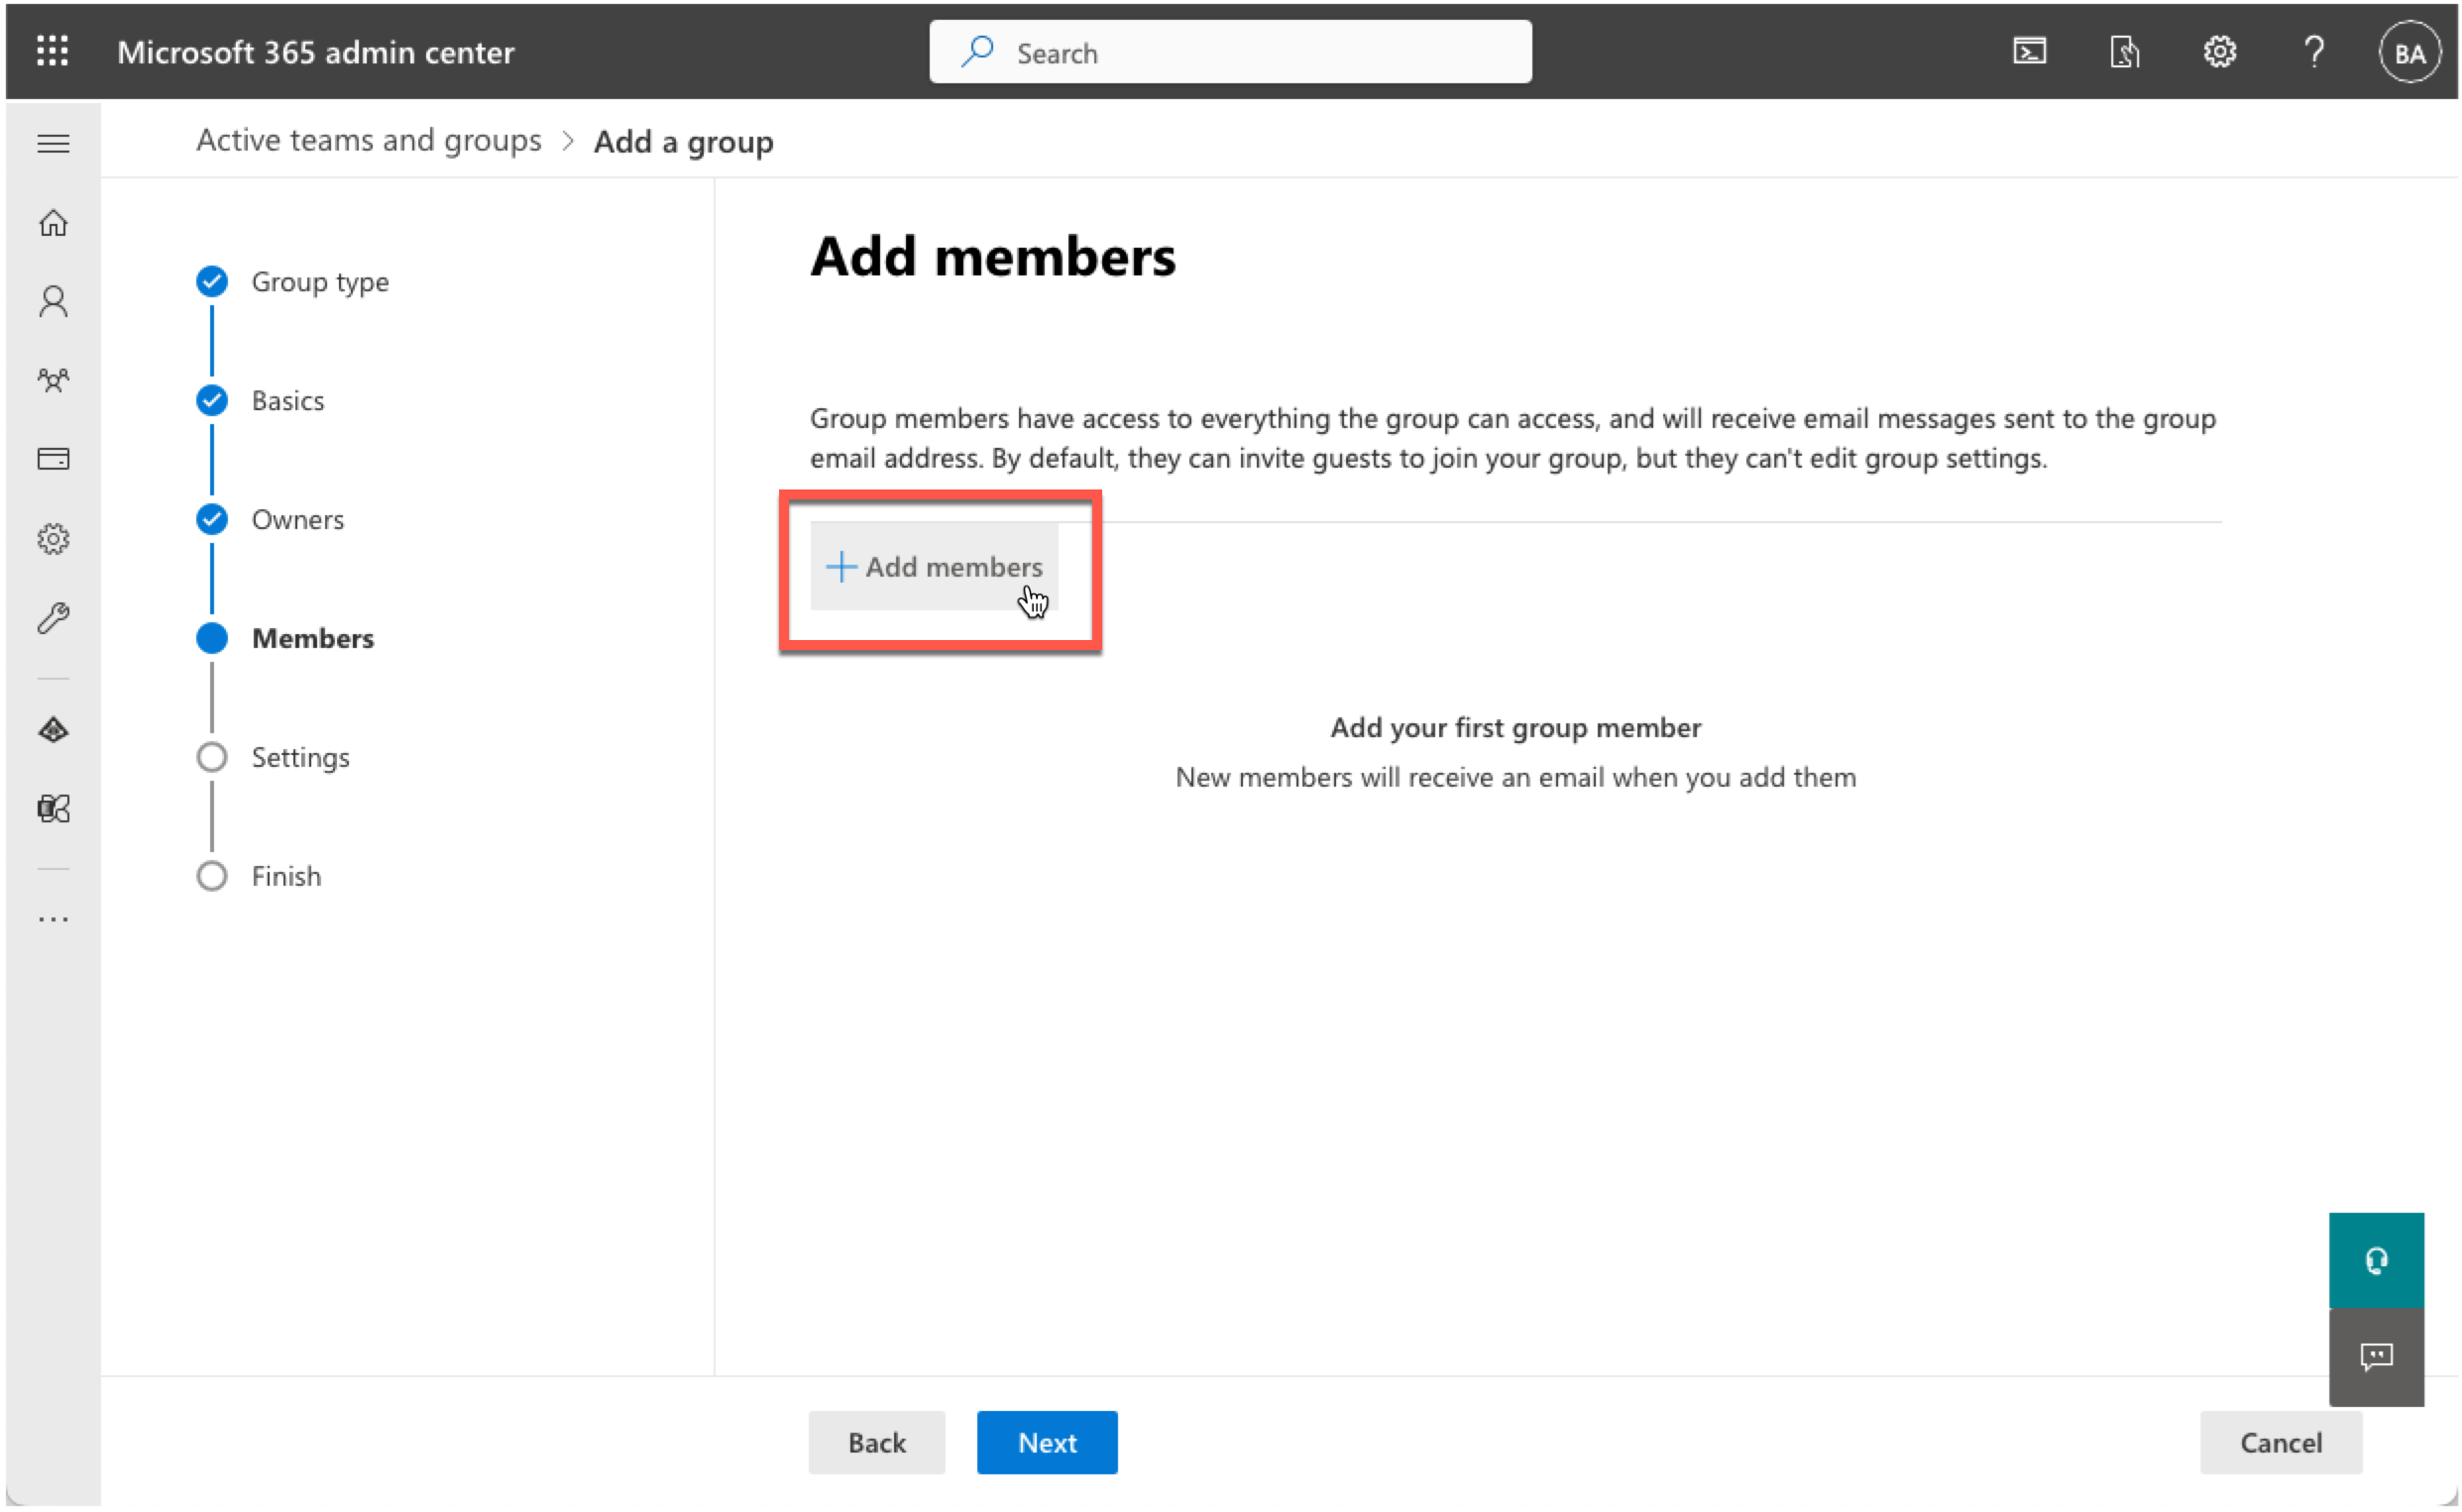
Click Next
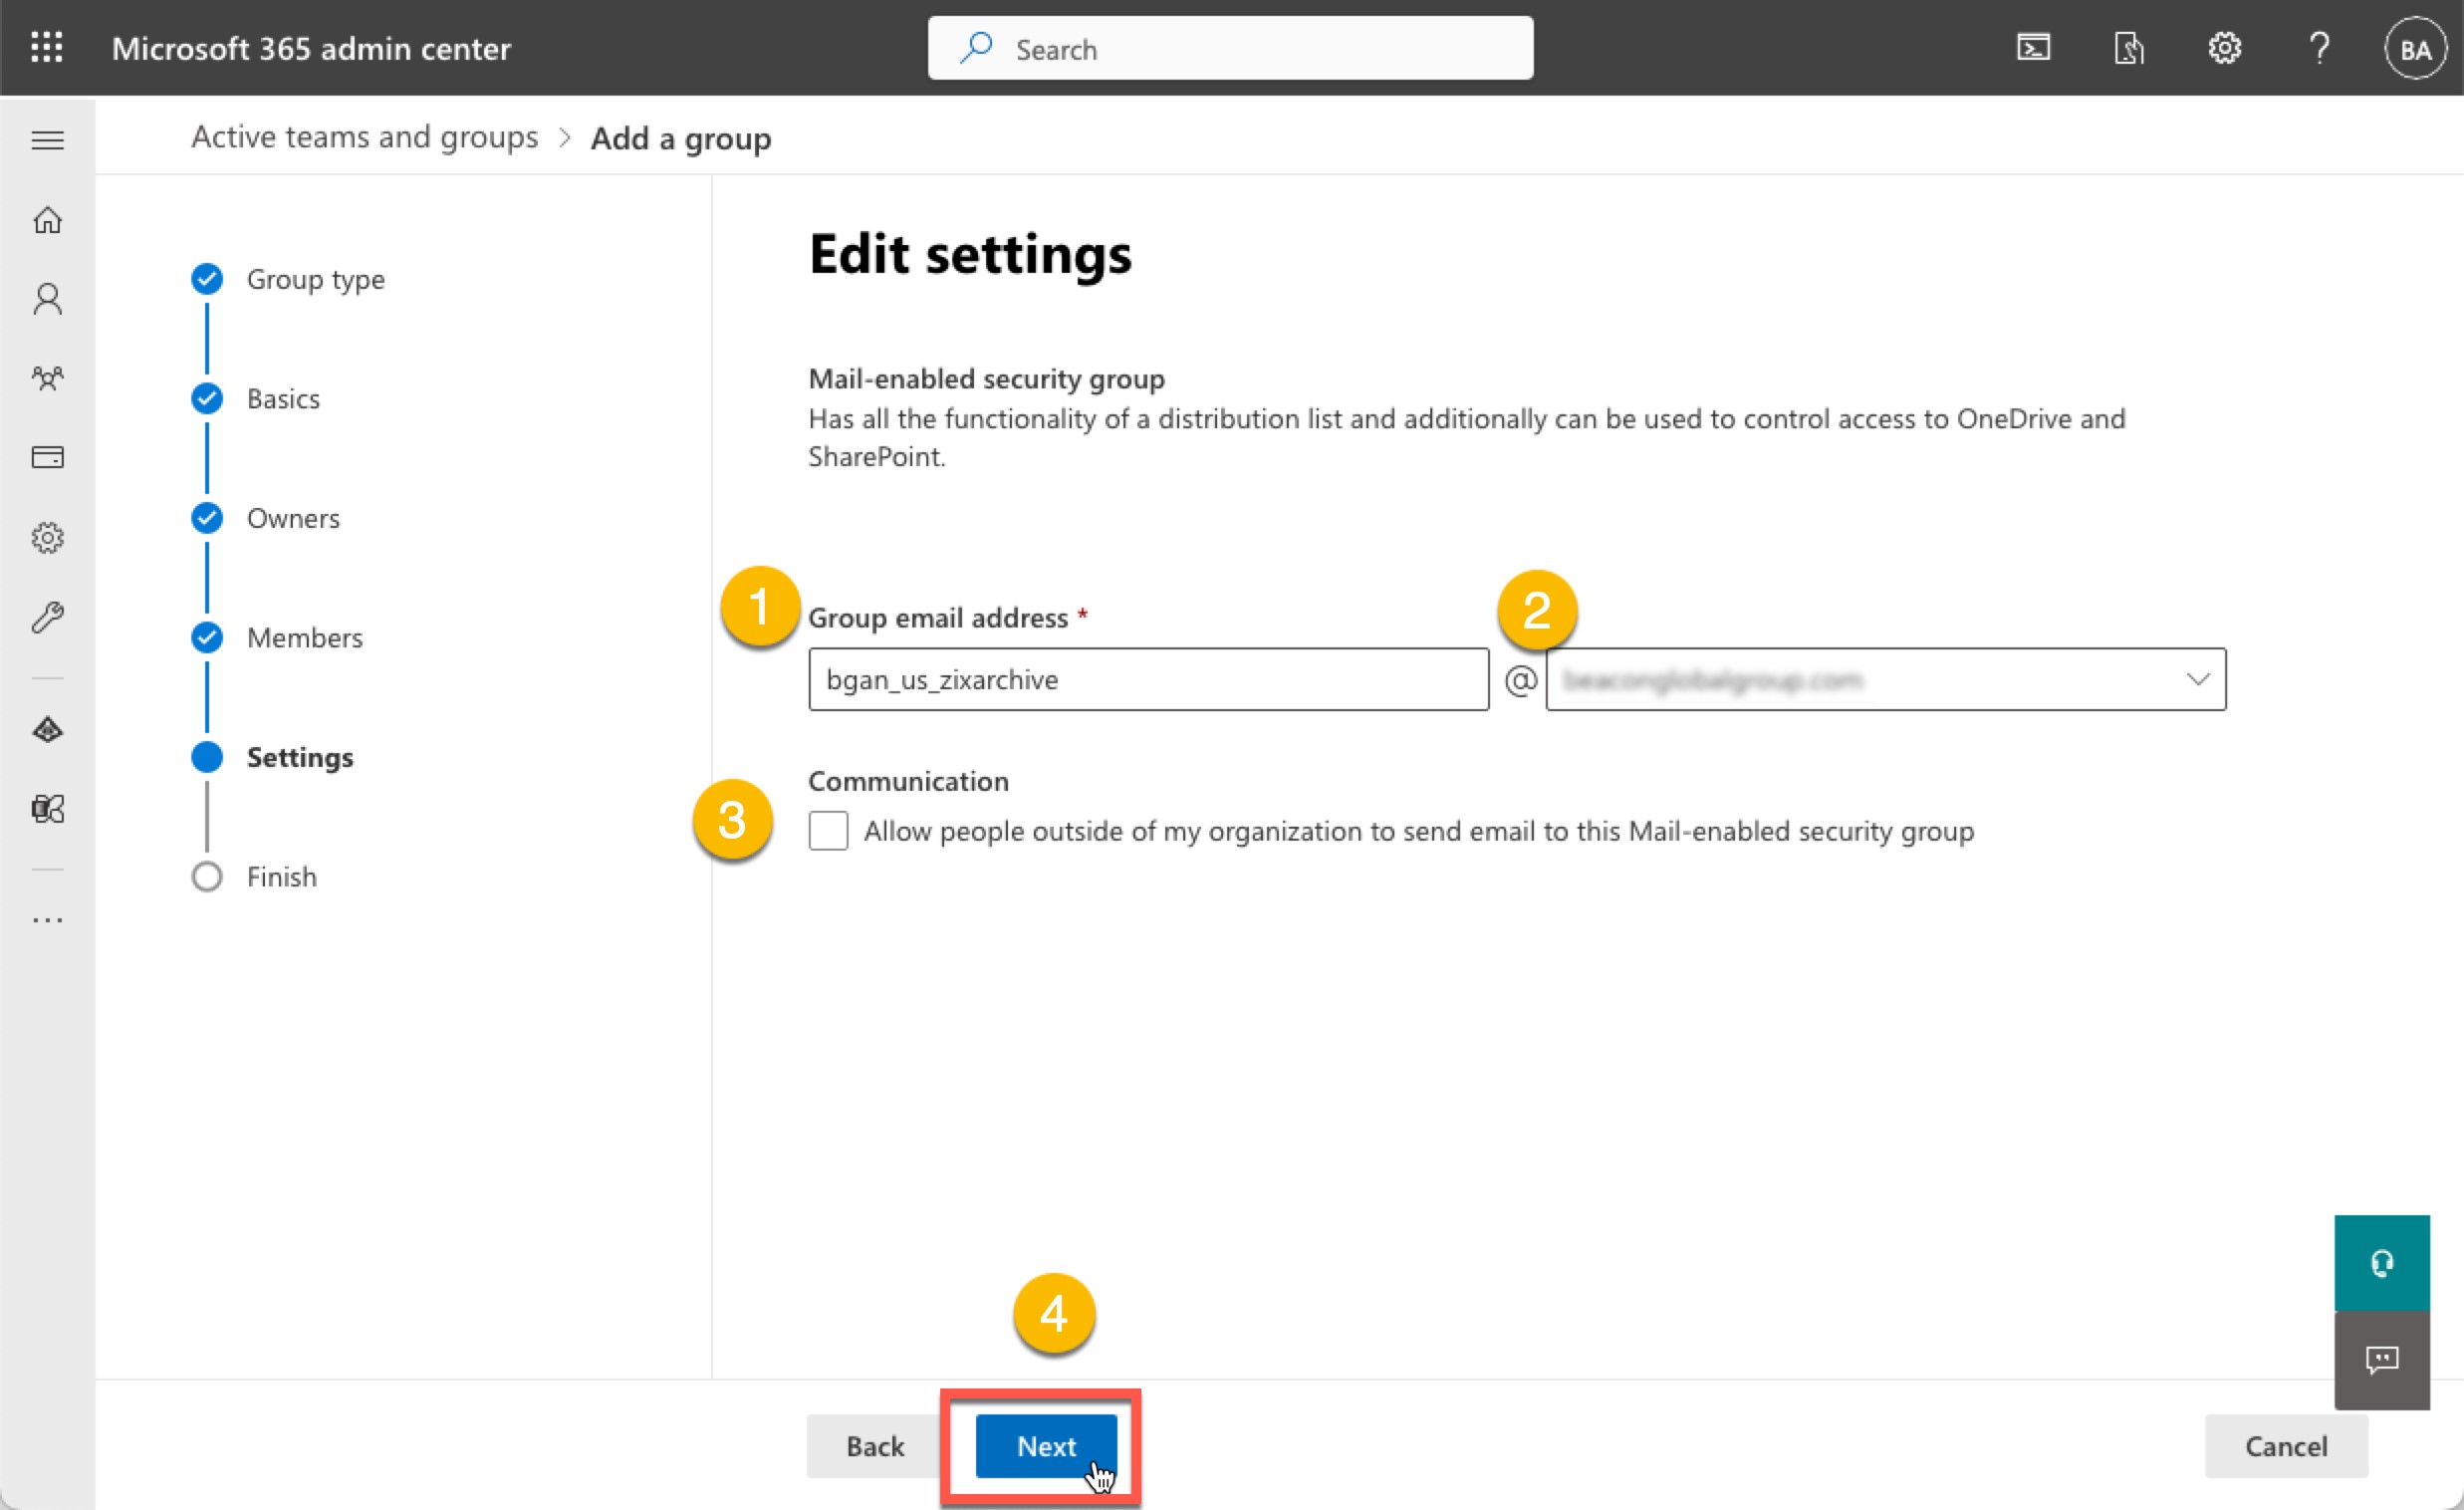
Enter a Group email address name (#1) and select the domain from the dropdown to archive (#2), we recommend not checking Communication (#3) and then click Next (#4.)
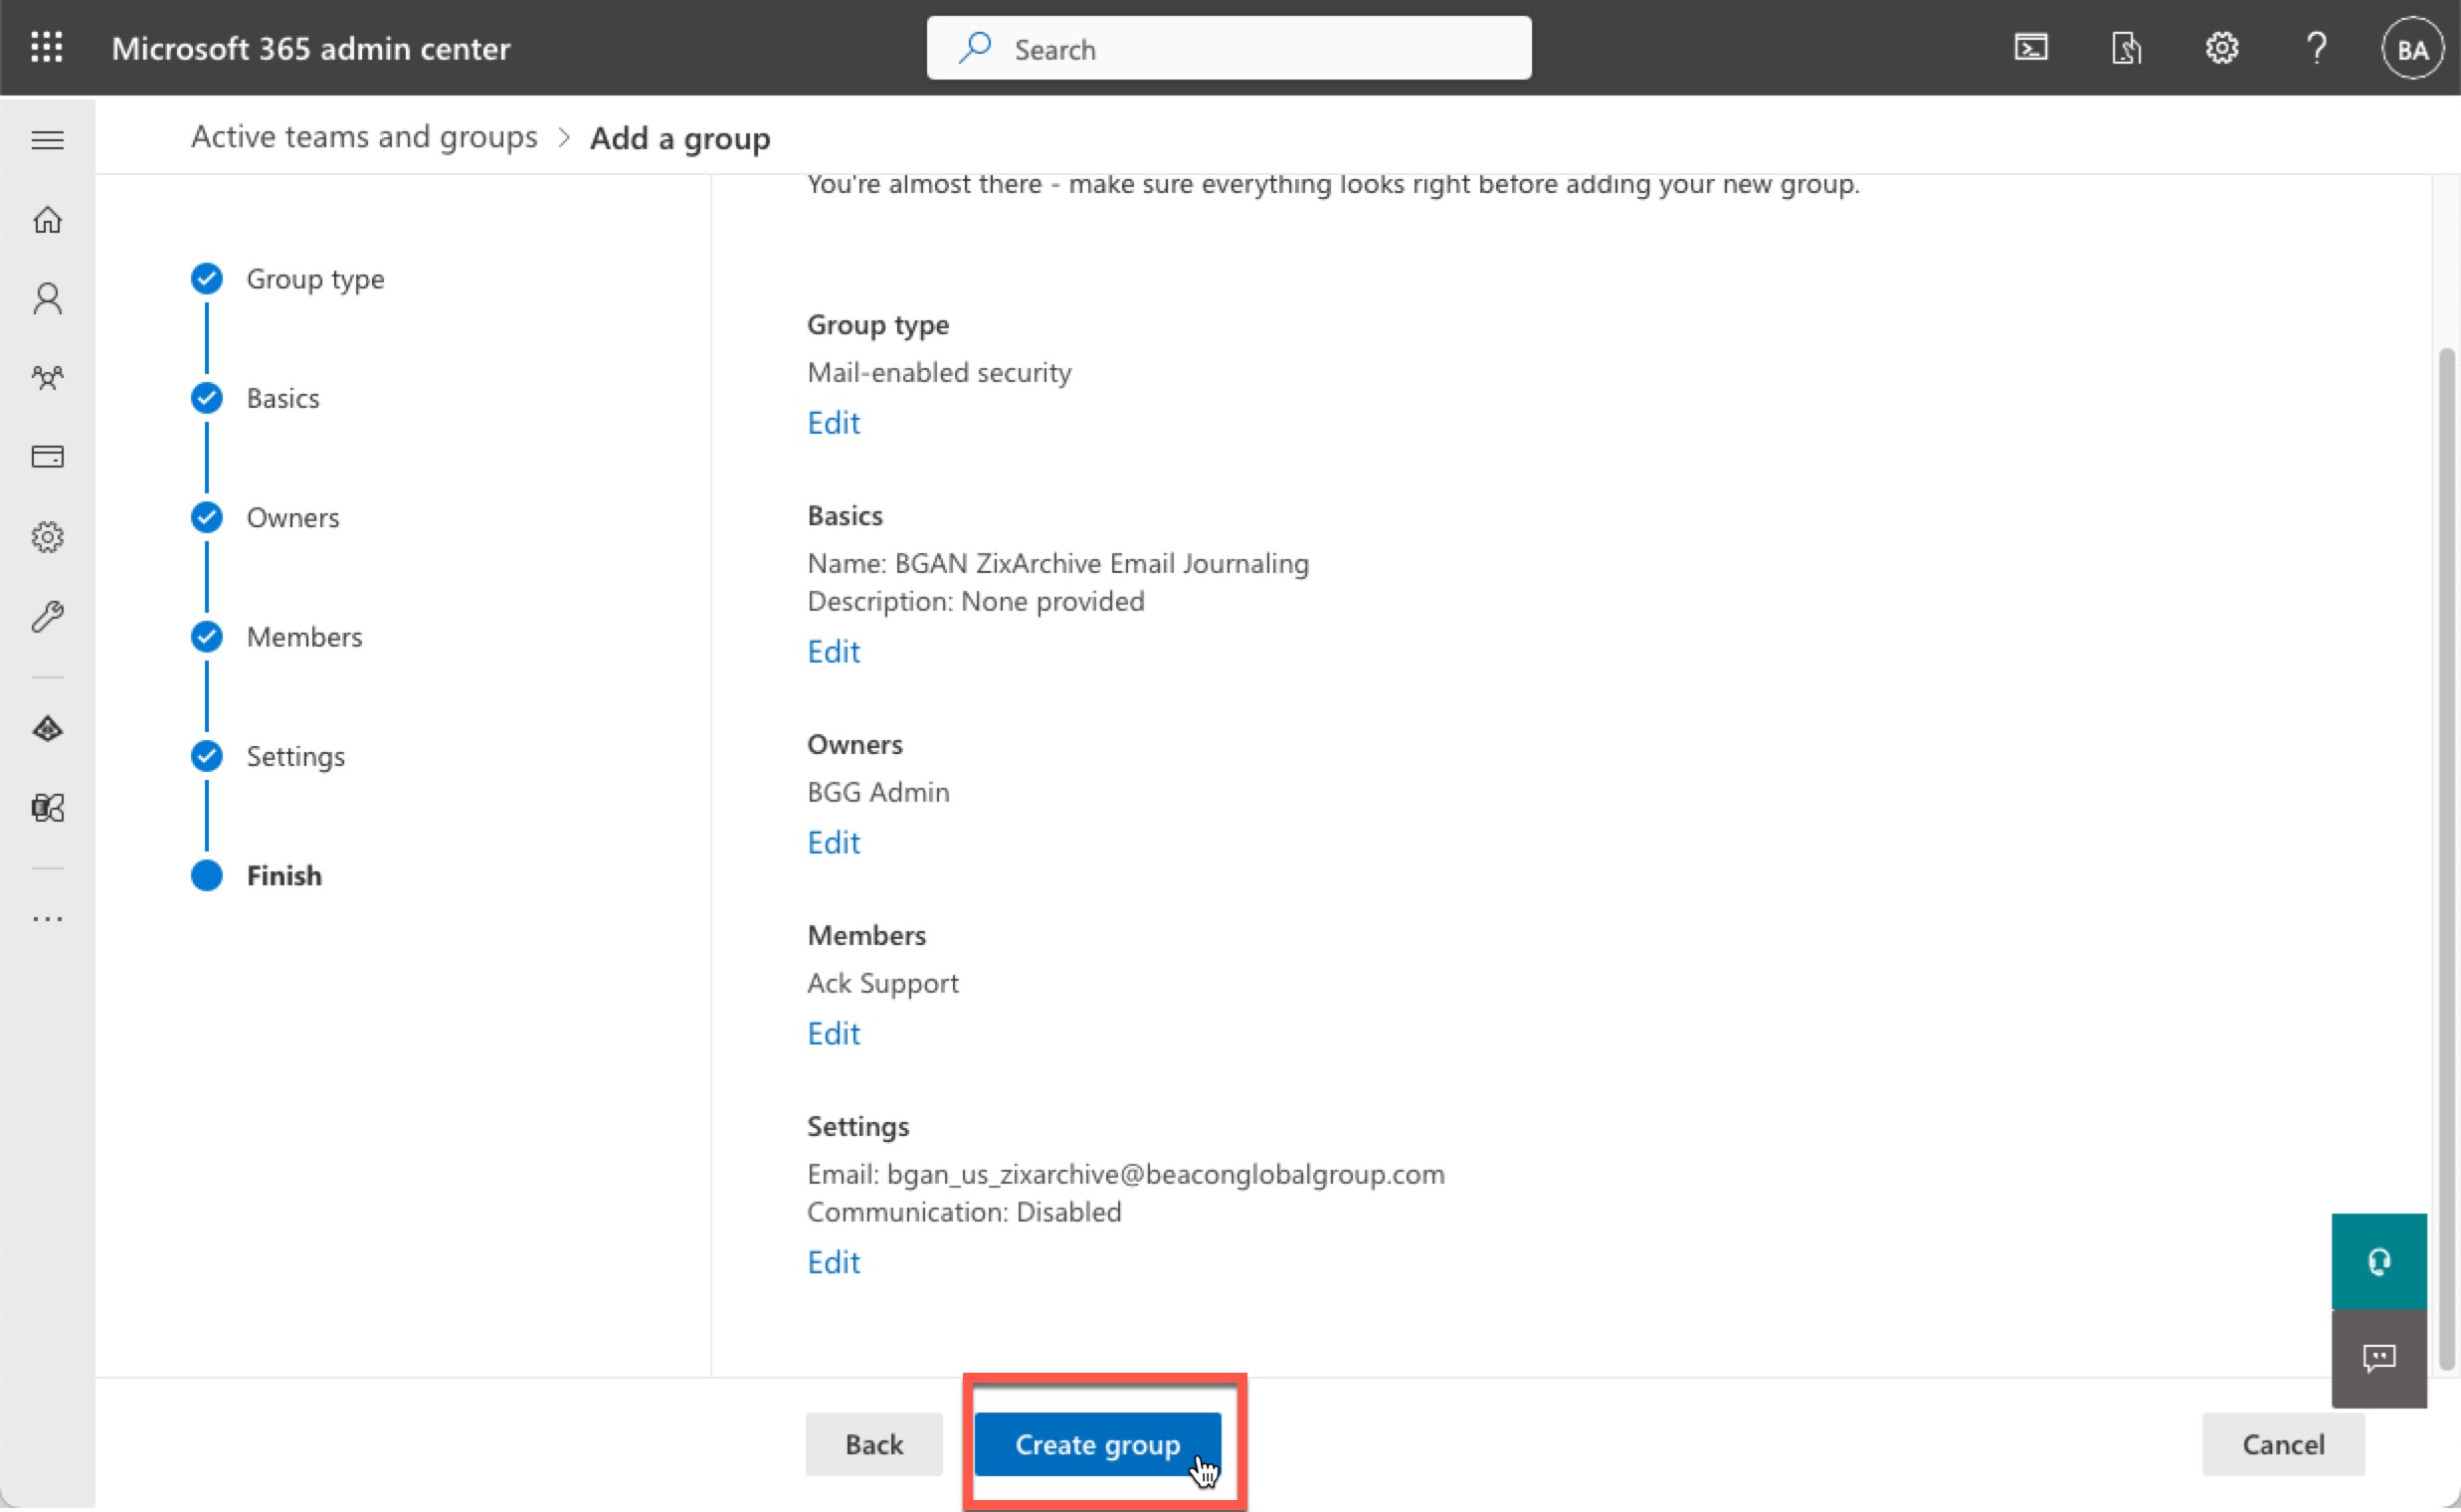
Review the settings, then click Create group
Go back to the Journal rules, then select A specific user or group, then click Select a user or group and select the Group you created earlier.